What is the best antenna for a drive-in FM transmitter?
Your drive-in theater needs FM audio but you face antenna confusion. Wrong antenna choice causes weak signal or dead zones where cars cannot receive audio. Customer complaints follow immediately.
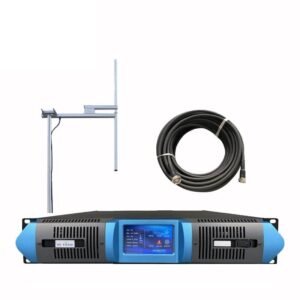
Dipole antennas are best for drive-in FM transmitters because they provide omnidirectional 360° coverage reaching all parking spots equally, install in 30 minutes, handle 50W-500W power typical for drive-ins, and mount easily on existing structures. RS offers complete drive-in FM kits at https://fmradiotx.com/ including transmitter, dipole antenna, and cable.
I help drive-in theaters nationwide at RS. Most problems come from wrong antenna type or poor mounting location.
What is a dipole antenna and how does it work?
Understanding antenna basics prevents expensive mistakes.
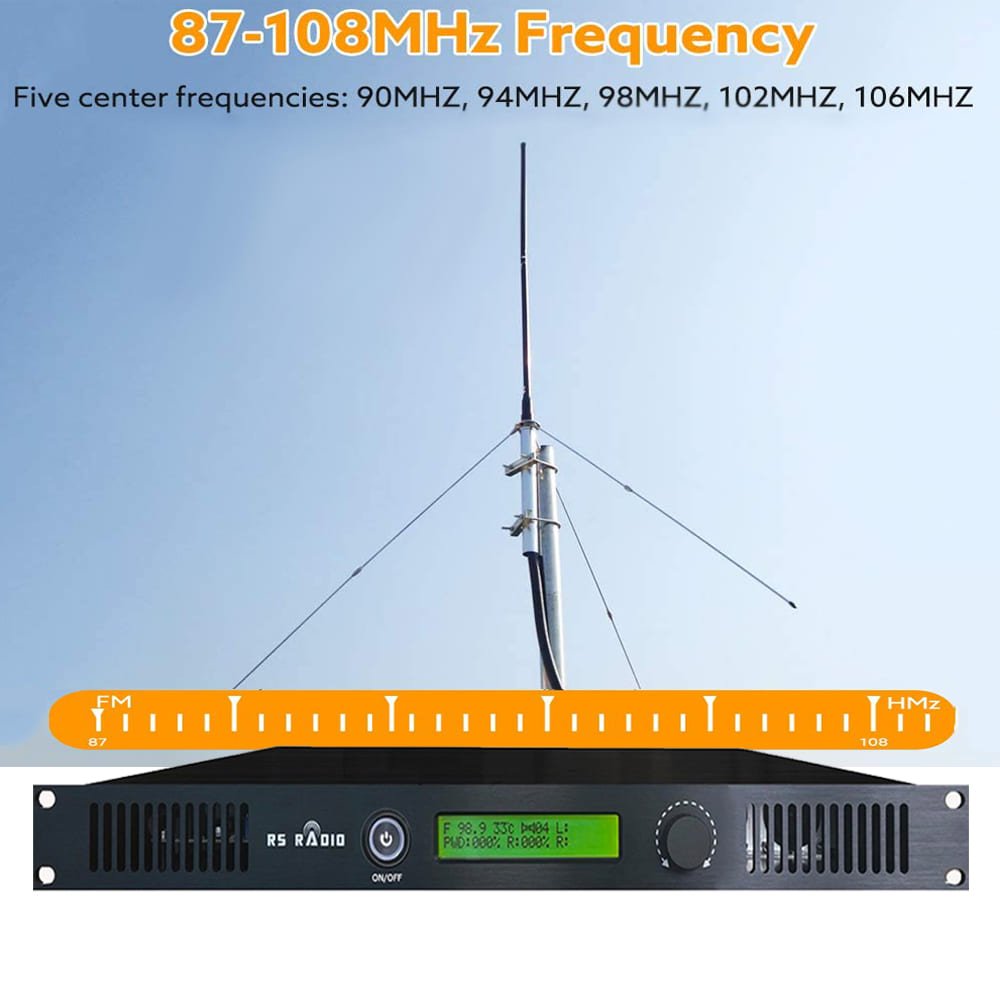
A dipole antenna1 consists of two metal rods extending from center feed point. Each rod measures quarter wavelength of broadcast frequency. Transmitter sends RF signal through coaxial cable to feed point. Antenna converts electrical energy into electromagnetic waves radiating omnidirectionally covering entire parking area equally in all directions.
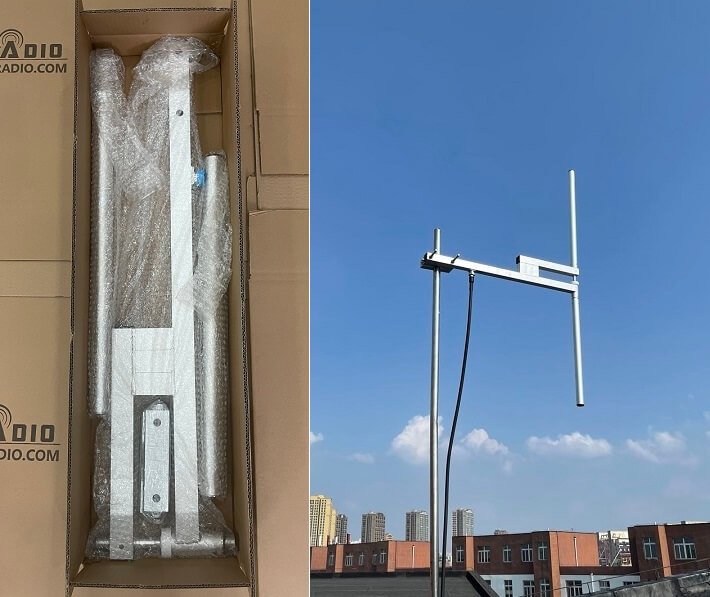
Dipole construction is simple. Two aluminum tubes mount vertically from central connector where coaxial cable attaches. At 100MHz each tube measures 0.71 meters. Total length equals 1.43 meters. Feed point creates 50 ohm impedance matching transmitter output and cable impedance preventing power loss.
Radiation pattern determines coverage. Vertical dipoles radiate equally 360 degrees horizontally covering circular areas perfectly. Signal strength remains consistent at all parking spots regardless of position. This omnidirectional pattern suits drive-in theaters needing uniform audio delivery to hundreds of parked vehicles.
Drive-in applications typically use 50W-200W transmitters covering 200-500 meter radius. Single bay dipole handles this power easily. RS FU-DV1 dipole antenna supports up to 500W continuous power sufficient for any drive-in installation. Higher power wastes money without improving coverage at short distances.
| Dipole Component | Specification | Function |
|---|---|---|
| Two metal rods | 0.71m each at 100MHz | Radiating elements |
| Feed point | 50 ohm impedance | Cable connection |
| Mounting bracket | Weatherproof aluminum | Physical support |
Why is a dipole antenna best for FM transmitters?
Many antenna types exist but dipoles dominate drive-in installations for specific reasons.
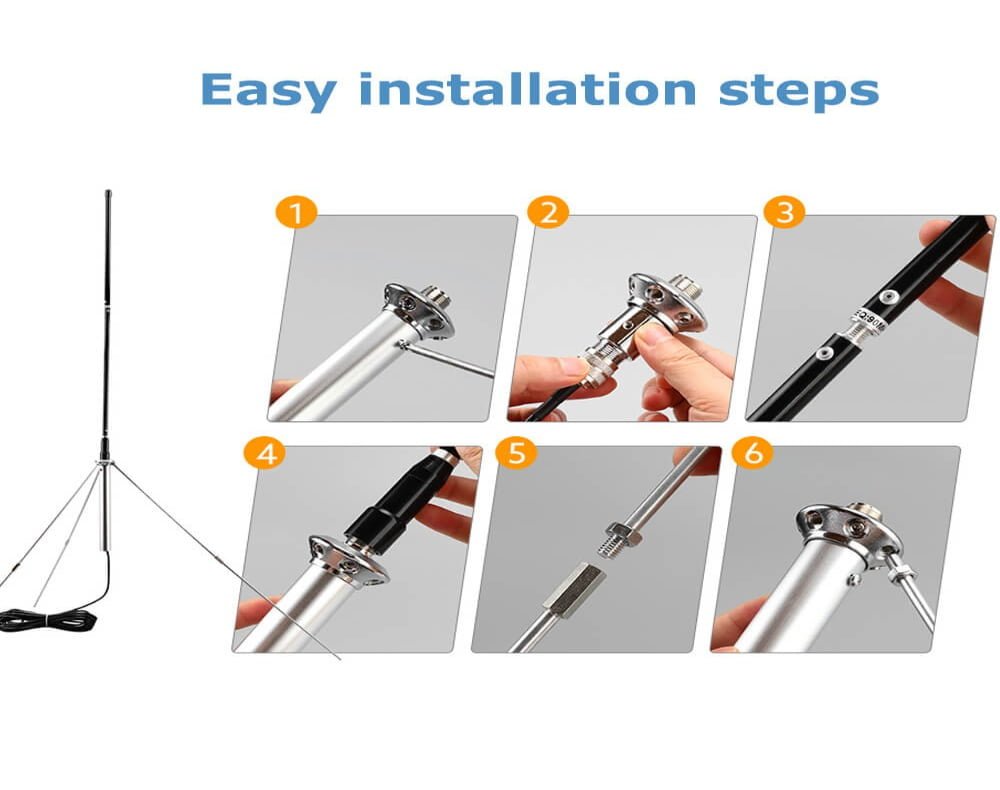
Dipole antennas are best because they radiate equally 360° covering all parking spots, install in 30 minutes without professional riggers, require no tuning or adjustment, operate reliably 10+ years outdoors, and handle 50W-500W power matching drive-in transmitters perfectly.
Omnidirectional coverage matches drive-in layouts. Parking areas surround the screen in semicircle or full circle patterns. Dipoles radiate equally in all directions ensuring every parking spot receives identical signal strength. Directional antennas concentrate power toward specific areas leaving dead zones where cars receive weak or no audio.
Simple installation saves time and money. One person mounts dipole antenna in 30 minutes using basic tools. No professional riggers or cranes needed. RS dipole weighs only 3-5kg. Attach to existing pole or mount new 3-5 meter mast. Connect cable and broadcast immediately. Directional arrays require days of installation and professional alignment.
Low cost fits drive-in budgets. RS single bay dipole costs $325 including mounting hardware. Directional Yagi arrays cost $800-1500. Circular polarized antennas cost $1200-2500. Drive-in theaters operate seasonally in many areas making low initial investment important. Dipoles deliver excellent performance at minimal cost.
Reliable operation prevents show disruptions. Dipole antennas contain no complex components failing during critical moments. Simple metal rods and connector operate flawlessly season after season. RS dipoles withstand wind speeds 150 km/h, temperature extremes -40°C to +60°C, and continuous rain without performance degradation. I have seen RS dipoles operating 12+ years at drive-in theaters without replacement.
| Dipole Advantage | Benefit | Drive-in Application |
|---|---|---|
| 360° coverage | Equal signal all spots | Semicircle/circle parking |
| 30 minute install | Low labor cost | Seasonal operation |
| $200-300 cost | Budget friendly | Multiple screen locations |
How to improve FM signal strength with a dipole antenna?
Weak signal causes customer complaints and lost revenue. Maximize coverage using proven methods.
Improve FM signal strength by increasing antenna height from 5m to 10m doubling coverage radius, eliminating obstacles between antenna and parking area, using low-loss coaxial cable reducing power loss, checking VSWR below 1.5 ensuring efficient power transfer, upgrading transmitter from 50W to 100W increasing coverage 40%, and adding second bay dipole increasing gain 3dB.
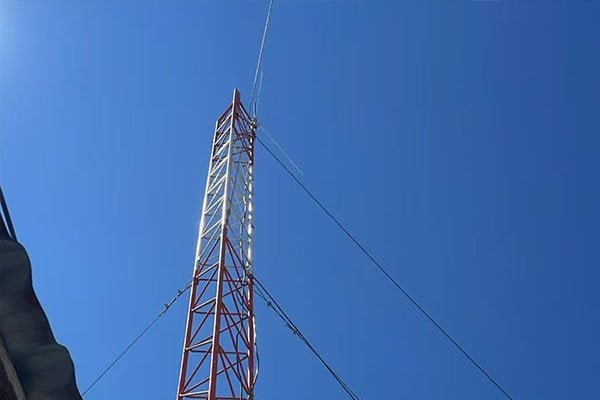
Antenna height affects coverage most. Every meter height increase extends coverage radius. Installing antenna at 5 meters covers 200 meter radius. Moving to 10 meters covers 300 meter radius. Moving to 15 meters covers 400 meter radius. This costs zero dollars just requiring taller mounting pole. I recommend minimum 10 meter height for drive-in installations covering typical 250-350 meter parking areas.
Eliminate obstacles blocking signals. Metal buildings, trees, and hills between antenna and parking area reduce signal strength 10-30dB creating dead zones. Survey parking area identifying obstacles. Relocate antenna achieving clear line of sight to all parking spots. Even partial obstruction reduces coverage significantly.
Use quality coaxial cable minimizing loss. RS recommends 1/2" diameter cable for runs under 30 meters or 7/8" cable for runs 30-100 meters. Poor quality cable loses 3-5dB power between transmitter and antenna wasting expensive transmitter power as heat. Calculate cable loss carefully. 30 meters of 1/2" cable loses 2.1dB at 100MHz. This converts 100W transmitter to 61W at antenna reducing coverage 20%.
Check VSWR ensuring efficient power transfer. VSWR measures impedance match between transmitter, cable, and antenna. VSWR below 1.5 indicates excellent match transferring 96% of power to antenna. VSWR 2.0 transfers only 89% wasting 11% as reflected power. VSWR above 3.0 damages transmitters. Measure VSWR during installation and seasonally. High VSWR indicates damaged cable or loose connectors requiring immediate correction.
| Improvement Method | Cost | Coverage Increase |
|---|---|---|
| Raise height 5m to 10m | $100-300 pole | 50% radius increase |
| Upgrade 50W to 100W | $200-400 | 40% radius increase |
| Add second bay | $300-400 | 40% radius increase |
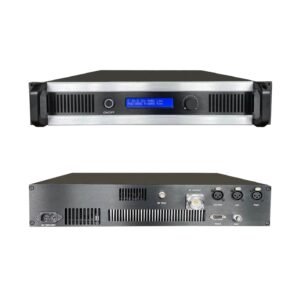
Upgrade transmitter power when height increases fail. RS offers 50W, 100W, 150W, and 200W transmitters for drive-in applications. Doubling power from 50W to 100W increases coverage radius 40%. Quadrupling power from 50W to 200W increases radius 100%. However height increases deliver better results than power increases at lower cost.
Add second bay dipole for challenging locations. Stacking two dipoles vertically increases gain 3dB equivalent to doubling transmitter power. Two bay system costs $500-700 total versus buying higher power transmitter. This option suits locations with height restrictions or extreme coverage requirements.
How to connect a dipole antenna to an FM transmitter?
Correct connection ensures maximum power transfer and prevents equipment damage.
Connect dipole antenna by routing low-loss coaxial cable from transmitter RF output to antenna feed point, using N-type connectors for transmitters under 100W or 7/16" DIN connectors for 100W-500W, applying weatherproof silicone sealant at antenna connection, grounding antenna mounting bracket to earth ground rod, measuring VSWR below 1.5, and testing signal at farthest parking spots.
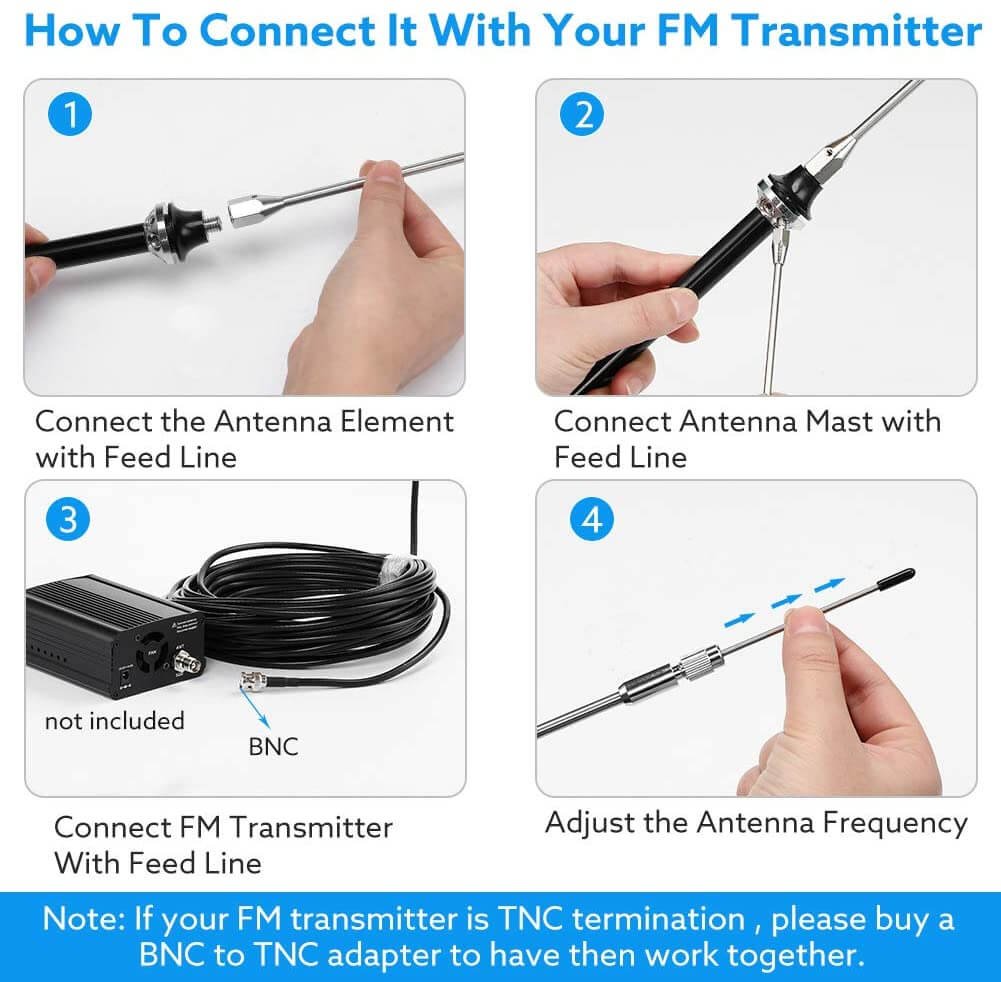
Select appropriate coaxial cable. Transmitters under 100W use 1/2" diameter cable like LMR-400 or equivalent. Transmitters 100W-200W use 1/2" cable for runs under 30 meters or 7/8" cable for longer runs. Higher quality cable costs more but delivers more power to antenna. I recommend spending $3-5 per meter for quality cable versus $1-2 per meter for budget cable losing excessive power.
Route cable carefully from transmitter to antenna. Secure cable every 2 meters using cable clamps preventing wind damage. Avoid sharp bends maintaining minimum 10x cable diameter bend radius. Keep away from power lines preventing interference. Enter building through proper weatherproof penetration preventing water leaks. Install drip loop before entry forcing water to drip off cable instead of following into building.
Attach connectors properly. Strip cable carefully exposing center conductor and shield without nicking or cutting strands. Slide connector parts over cable per manufacturer instructions. Crimp or solder per connector type. Poor connections cause high VSWR and power loss. I recommend professional connector installation for first-time installers. Pre-made cables with factory connectors eliminate installation errors.
Apply weatherproofing at antenna connection. Wrap connection with self-amalgamating tape creating waterproof seal. Apply silicone sealant around connection. Water intrusion causes corrosion and VSWR problems within months. Proper weatherproofing prevents failures for years.
Ground system protects equipment and meets electrical codes. Connect antenna mounting bracket to earth ground using 6mm copper wire. Drive ground rod 2 meters deep into moist soil. Bond coaxial cable shield to ground at antenna and at transmitter building entry. Lightning strikes near antenna discharge safely to ground instead of destroying transmitter.
| Connection Step | Requirement | Common Mistake |
|---|---|---|
| Cable type | LMR-400 or better | Using cheap RG-58 |
| Connector | N-type or 7/16" DIN | Poor crimping |
| Weatherproofing | Tape plus silicone | Skipping this step |
Test VSWR before full power operation. Connect VSWR meter between transmitter and cable. Transmit at 10W power. Read forward and reflected power. Calculate VSWR. Values below 1.5 excellent. Values 1.5-2.0 acceptable. Values above 2.0 indicate problems. Common causes include wrong antenna length, damaged cable, loose connectors, or metal objects near antenna. Correct problems before increasing power.
Test actual coverage driving through parking area. Tune car radio to broadcast frequency. Drive to farthest parking spots measuring signal strength. Signal should remain strong and clear throughout parking area without static or dropouts. Weak areas indicate antenna placement problems or insufficient power requiring adjustment.
Conclusion
Dipole antennas are best for drive-in FM transmitters providing 360° omnidirectional coverage, costing only $200-300, installing in 30 minutes, and handling 50W-500W power. Improve signal strength by increasing antenna height to 10m minimum, using quality coaxial cable, checking VSWR below 1.5, and upgrading transmitter power if needed. RS provides complete drive-in FM broadcasting kits at https://fmradiotx.com/ including transmitters, dipole antennas, cables, and connectors with 5-year warranty and free worldwide shipping.
-
Explore this link to understand the fundamental principles and applications of dipole antennas in communication. ↩