Top 10 Must-Have Accessories for FM Transmitter Systems
Essential Upgrades to Maximize Coverage, Audio Quality, and Reliability
I’m an RF engineer at RS, and I’ve helped set up over 300 FM broadcasting systems. Maybe you already have a transmitter but coverage disappoints you. Or audio quality sounds worse on air than in the studio. Or your system goes down during storms and you scramble to restore service.
The transmitter is just the starting point. The right accessories transform a basic setup into a professional system with better coverage, cleaner audio, and rock-solid reliability. This guide covers the 10 accessories that make the biggest difference based on real field deployments.

Accessory 1: Professional FM Broadcast Antenna
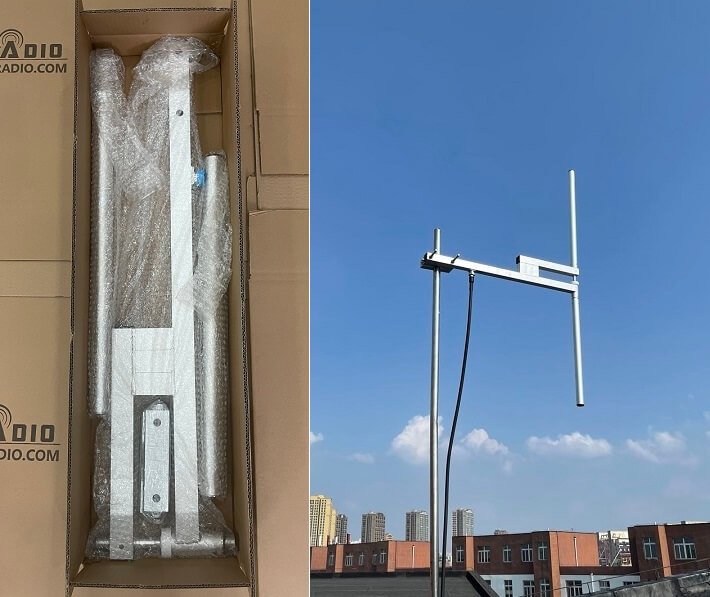
What It Does
The antenna converts electrical RF energy into radio waves. It’s the single most important accessory determining your coverage area. Your transmitter’s power rating means nothing if the antenna can’t radiate efficiently.
Problems Without It
Using random wire, improvised dipoles, or cheap car antennas creates unpredictable radiation patterns with deep nulls. I’ve measured 15 dB variation between directions with improvised antennas—your coverage might reach 12 km north but only 3 km south. Indoor antennas lose 15-25 dB through building materials, reducing 100W transmitter to 5W effective output.
How to Choose
| Antenna Type | Gain | Best For | Price Range |
|---|---|---|---|
| Dipole | 0-2 dBd | Small coverage, budget systems | $40-120 |
| 1/4 Wave GP | 0-3 dBd | Mobile reception priority | $60-180 |
| 2-Bay | 3-4 dBd | Medium coverage boost | $150-300 |
| 4-Bay | 6-7 dBd | Maximum horizontal coverage | $280-600 |
| Circular Polarized | 0-3 dBd | Professional broadcast | $200-800 |
Key specs: Impedance must be 50Ω. Power rating should exceed your transmitter by 30% minimum (150W antenna for 100W transmitter). Frequency range must cover your operating frequency ±500 kHz.
Which Scenario
- 15-100W systems: Dipole or single-bay GP sufficient
- 100-500W systems: 2-bay or quality circular polarized
- 500W+ systems: 4-bay or professional circular polarized arrays
- Mobile/car reception priority: Vertical polarization (GP antennas)
- Mountainous terrain: Lower gain (0-3 dBd) for better vertical coverage
Accessory 2: Low-Loss Coaxial Cable and Quality Connectors
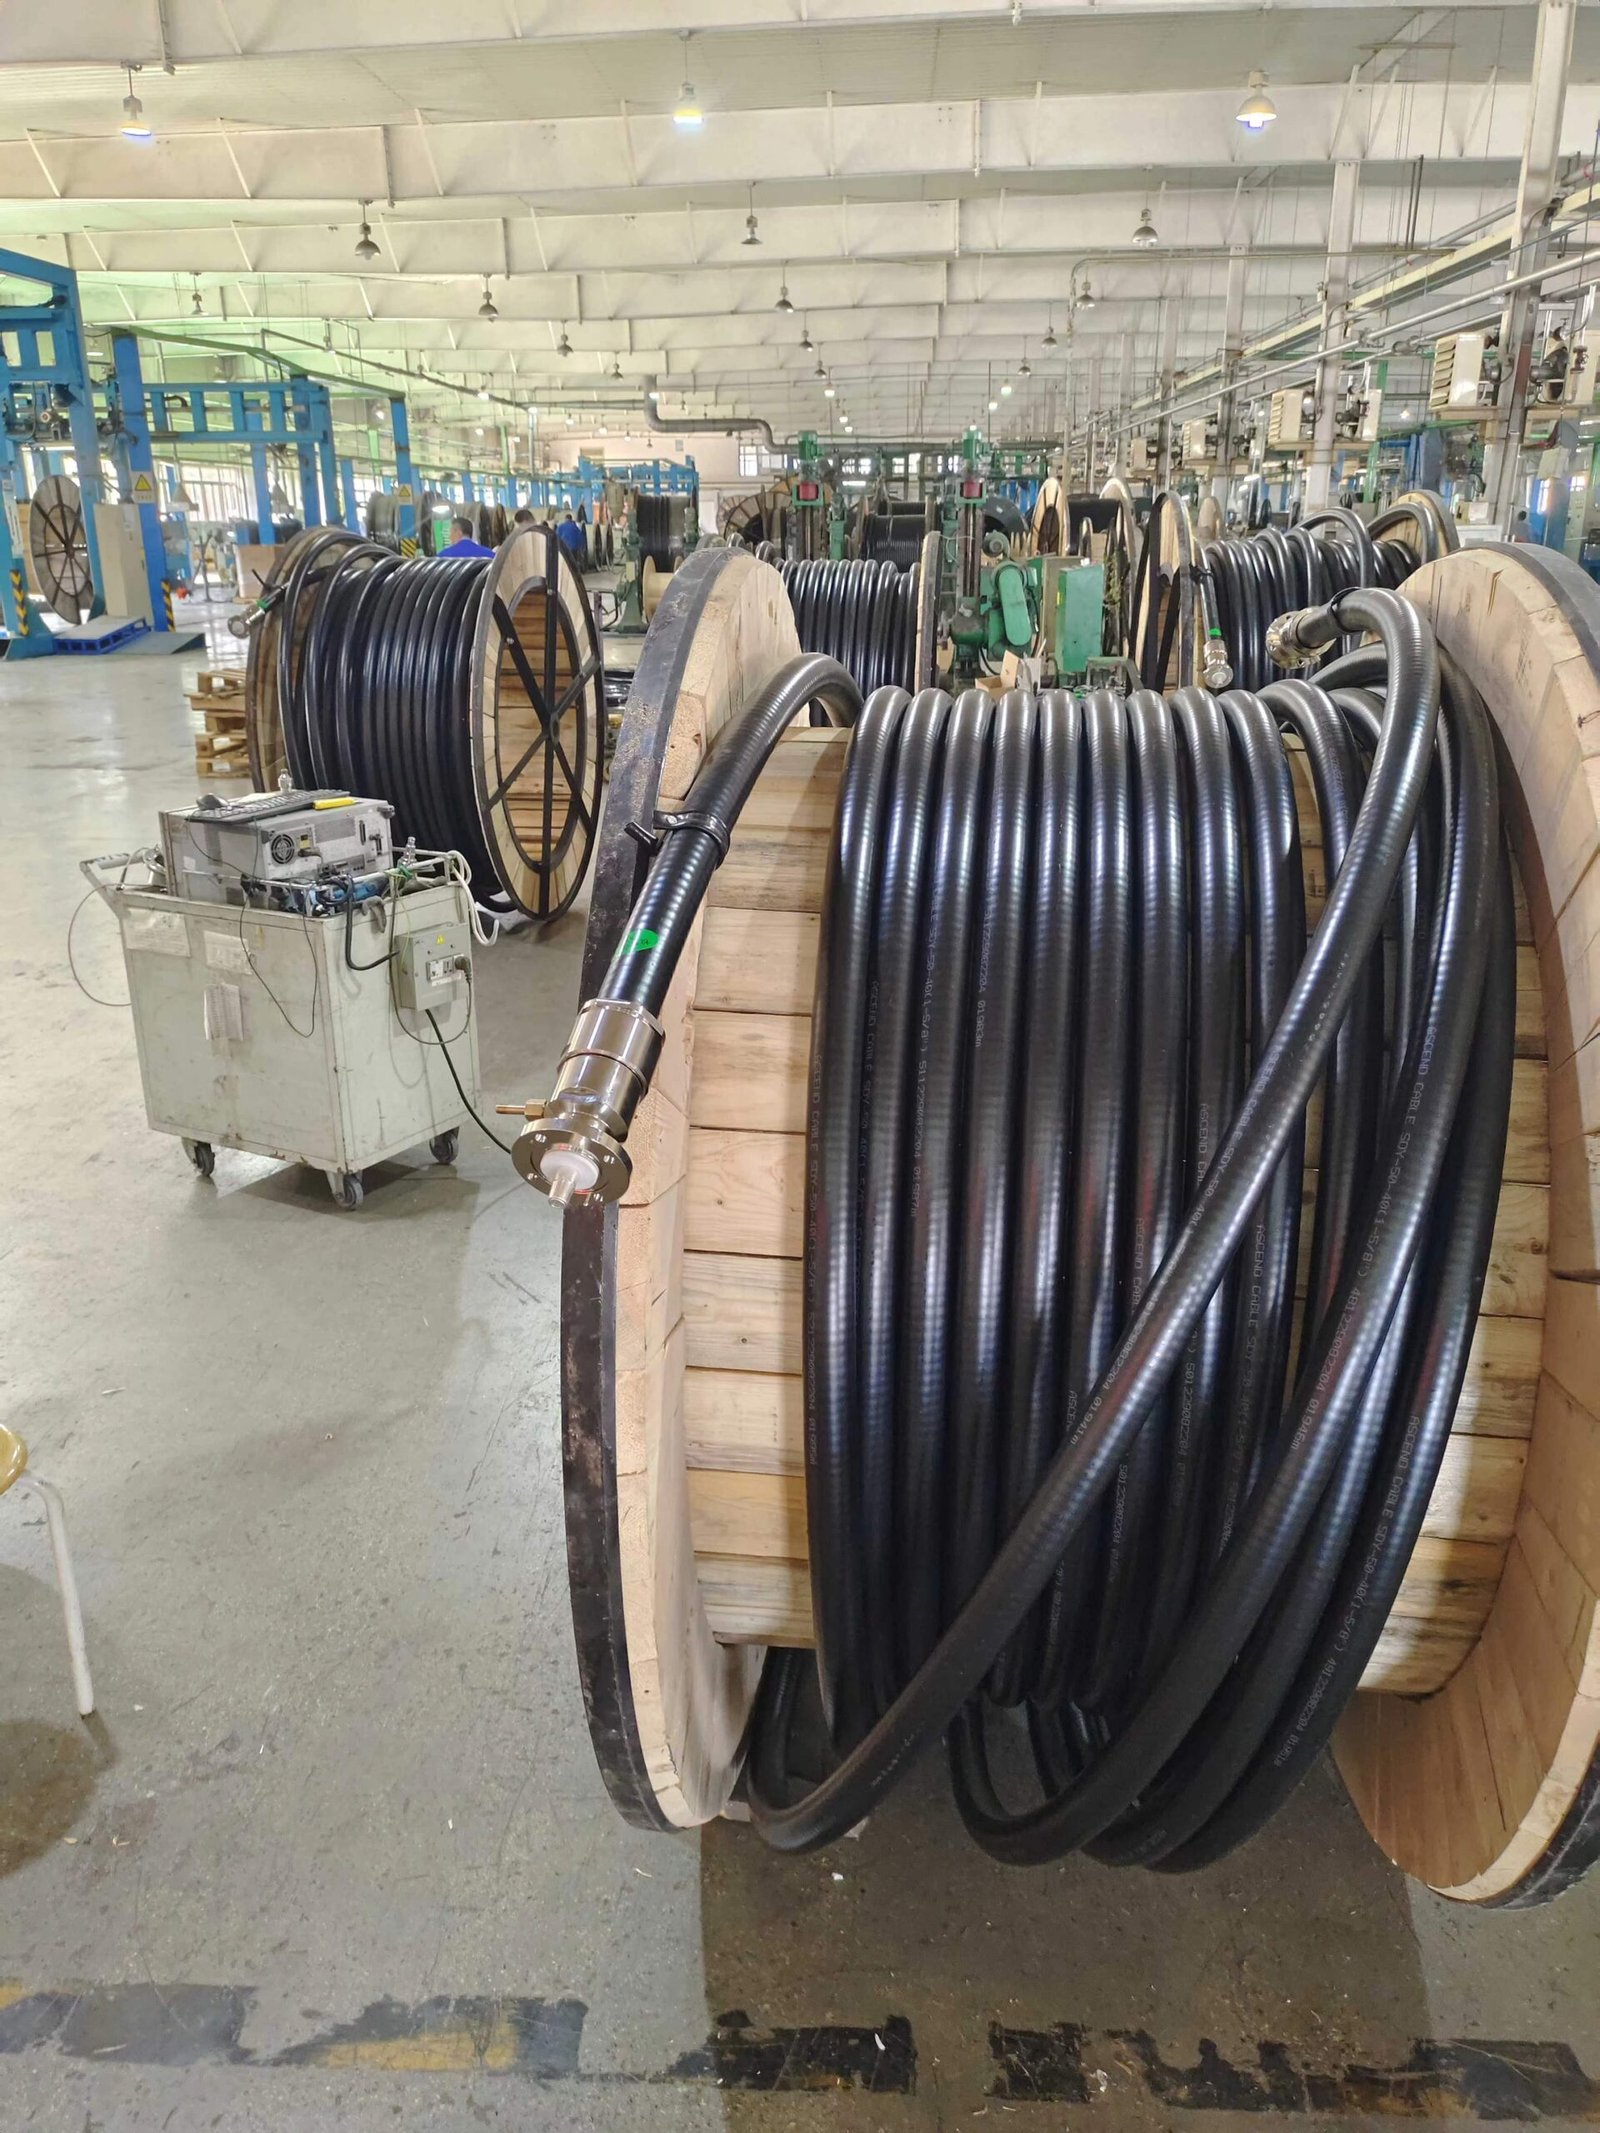
What It Does
Coaxial cable carries RF power from transmitter to antenna. Every meter of cable loses some power as heat. Quality cable and connectors minimize these losses, delivering maximum power to your antenna.
Problems Without It
Cheap RG-58 cable loses 75% of your transmitter power in a typical 30m run at FM frequencies. A 100W transmitter radiates only 25W. Poor connectors create intermittent connections, corrosion, and water intrusion leading to progressive coverage loss and eventual failure.
How to Choose
Cable loss comparison for 30m run:
| Cable Type | Loss | 100W Power at Antenna | Cost per Meter |
|---|---|---|---|
| RG-58 | -6.0 dB | 25W (75% lost!) | $0.80 |
| RG-8 | -2.1 dB | 62W | $1.20 |
| LMR-400 | -1.2 dB | 76W | $2.50 |
| 1/2" Hardline | -0.6 dB | 87W | $6.00 |
Connector choice: Use N-type connectors for professional installations ($8-15 each). They’re weatherproof and handle high power better than PL-259 connectors. Crimp or solder properly following manufacturer instructions.
Which Scenario
- 15-50W, runs <15m: RG-8 acceptable
- 50-300W any length, or 15-50W >15m: LMR-400 minimum
- 300W+ with runs >20m: 1/2" or 7/8" hardline
- Outdoor installations: Double-weatherproof all connections (self-amalgamating tape + quality electrical tape)
The cable upgrade from RG-8 to LMR-400 costs $40 more for 30m but delivers 22% more radiated power—equivalent to upgrading from 100W to 130W transmitter (which costs $150-200 more). The cable is the better investment.
Accessory 3: Audio Mixer or Console
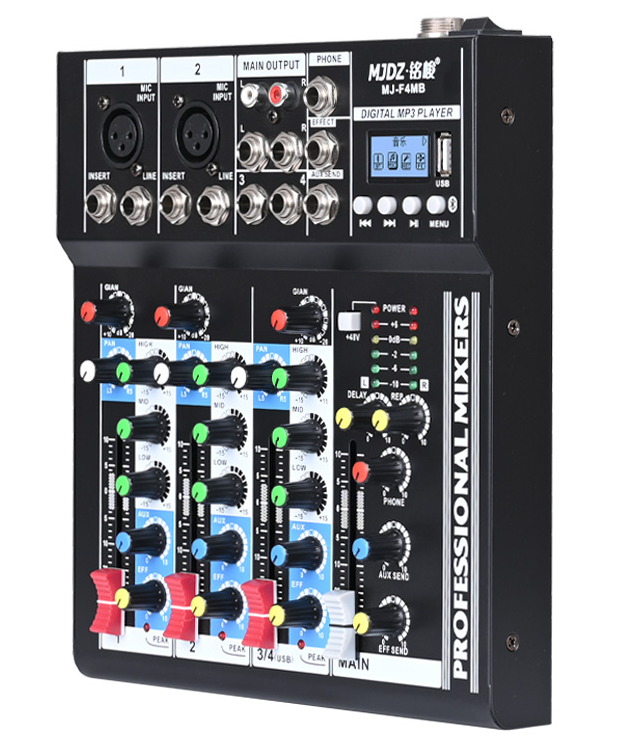
What It Does
Mixers combine multiple audio sources (microphones, music players, phone lines, computers) into a single stereo output feeding your transmitter. They provide level control, equalization, and clean switching between sources without pops or clicks.
Problems Without It
Plugging sources directly into transmitter inputs creates problems: mismatched levels (some sources too loud, others too quiet), no ability to mix sources simultaneously, switching between sources creates dead air or distortion, and no control over frequency balance or dynamics.
How to Choose
Key specifications:
- Channels: Count your sources (4-channel minimum for basic stations, 8-12 for multi-source operations)
- Preamps: Built-in mic preamps with phantom power (+48V) if using condenser microphones
- EQ: 3-band minimum per channel for tonal control
- USB interface: Digital connection to computers reduces noise
- Outputs: Balanced XLR or 1/4" TRS outputs for best noise rejection
| Mixer Type | Channels | Best For | Price Range |
|---|---|---|---|
| Budget analog | 4-8 | Simple setups, single operator | $80-200 |
| Mid-range analog | 8-16 | Multi-source, multiple operators | $200-500 |
| Digital mixer | 8-32 | Remote control, presets, processing | $400-2000 |
Which Scenario
- Single DJ/host: 4-6 channel mixer sufficient
- Multiple studios: Larger mixer or multiple mixers feeding master console
- Remote broadcasts: USB-connected digital mixer for computer control
- Automated systems: Look for mixers with GPIO or automation interfaces
Accessory 4: Audio Processor with Compressor/Limiter
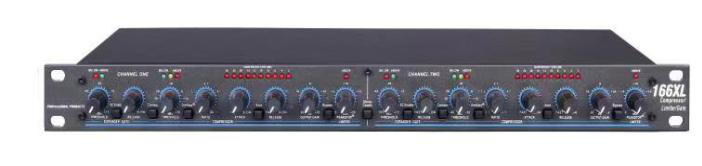
What It Does
Audio processors optimize your signal for broadcast by controlling dynamics (making quiet parts audible, preventing loud parts from distorting), enhancing frequency balance, and maximizing perceived loudness while protecting transmitter from overmodulation. Professional processors include AGC (automatic gain control), multiband compression, limiting, and stereo enhancement.
Problems Without It
Unprocessed audio creates multiple problems: inconsistent loudness between songs and spoken word forces listeners to constantly adjust volume; quiet passages get lost in receiver noise; loud peaks cause distortion and overmodulation; your station sounds quieter than competitors; and you risk FCC/regulatory violations from overmodulation.
How to Choose
Processing levels:
- Basic: Simple AGC + limiter ($50-150)
- Intermediate: Multiband compression + limiter ($150-500)
- Professional: Full multiband processing + stereo enhancement + RDS encoder ($500-3000)
Critical specs:
- Input/output levels: Must match your mixer output and transmitter input (typically +4 dBu or -10 dBV)
- Frequency response: 20 Hz – 15 kHz minimum for FM broadcast
- THD: <0.05% for transparent processing
- Attack/release times: Adjustable for different programming styles
Which Scenario
- Talk radio: Fast compression, heavy processing for intelligibility
- Music stations: Gentler compression preserving dynamics
- Community/campus: Mid-level processing balancing quality and loudness
- Professional commercial: Top-tier processing competing with major stations
I helped a community station upgrade from no processing to a $350 intermediate processor. Listener feedback immediately improved—"the station sounds so much better, clearer, louder." Same transmitter, same antenna, better audio chain.
Accessory 5: FM Monitoring Receiver
What It Does
A dedicated monitoring receiver lets you hear exactly what your listeners hear. It picks up your transmitted signal off-air, revealing actual broadcast quality including any RF issues, interference, or audio problems that don’t show up in studio monitoring.
Problems Without It
Studio monitoring only shows you the audio before transmission. It can’t detect: transmitter distortion, stereo pilot tone issues, multipath interference, interference from other stations, audio processing artifacts, RDS data errors, or coverage dead spots. You won’t know your signal has problems until listeners complain.
How to Choose
Receiver requirements:
- Frequency coverage: 87.5-108 MHz complete FM band
- Selectivity: >60 dB adjacent channel rejection minimum
- Sensitivity: -90 dBm or better for weak signal testing
- Stereo indicator: Confirms proper stereo transmission
- Signal strength meter: Helps field strength surveys
- Headphone output: For critical listening
| Receiver Type | Quality | Price Range | Best Use |
|---|---|---|---|
| Portable FM radio | Basic | $15-50 | Casual monitoring |
| Pocket professional | Good | $80-200 | Field surveys |
| Desktop reference | Excellent | $200-800 | Studio monitoring |
| Spectrum analyzer | Professional | $1000+ | Engineering diagnosis |
Which Scenario
- Budget systems: Quality portable receiver ($50-100) adequate
- Professional operations: Desktop reference receiver for studio monitoring
- Field surveys: Portable receiver with calibrated signal meter
- Engineering: Spectrum analyzer showing detailed RF characteristics
Position your monitoring receiver 30+ meters from transmitter with separate antenna. If too close, it receives direct RF leakage instead of the actual broadcast signal.
Accessory 6: Lightning Arrestor and Proper Grounding System
What It Does
Lightning arrestors shunt high-voltage surges from lightning strikes and static buildup to ground, protecting expensive transmitter equipment. Proper grounding systems provide low-resistance paths for these surges and eliminate RF ground loops that cause noise.
Problems Without It
Lightning strikes to or near your antenna couple thousands of volts into your coaxial cable. This destroys transmitter RF amplifiers, power supplies, and control circuits. Even near-miss strikes induce damaging voltages. I’ve seen $2000 transmitters destroyed by lightning that proper protection (costing $80) would have prevented. Poor grounding also causes:
- Audio hum and noise (ground loops)
- RF feedback and instability
- Intermittent operation
- Increased susceptibility to interference
How to Choose
Lightning protection components:
| Component | Function | Location | Cost |
|---|---|---|---|
| Coax arrestor | Shunts RF surges | Antenna base + building entry | $30-80 each |
| AC surge protector | Protects power supply | Equipment rack | $40-150 |
| Ground rod | Earth connection | Antenna base, building | $25-60 |
| Ground bus bar | Single-point ground | Equipment rack | $30-80 |
Installation requirements:
- Ground rod resistance: <10Ω measured with proper ground resistance meter
- Bonding: All ground points connected to single earth ground
- Cable routing: All cables (coax, AC power, audio) enter through common ground point
- Arrestor frequency range: Must cover 88-108 MHz with <0.2 dB insertion loss
Which Scenario
- All outdoor antennas: Coax arrestor mandatory at antenna and building entry
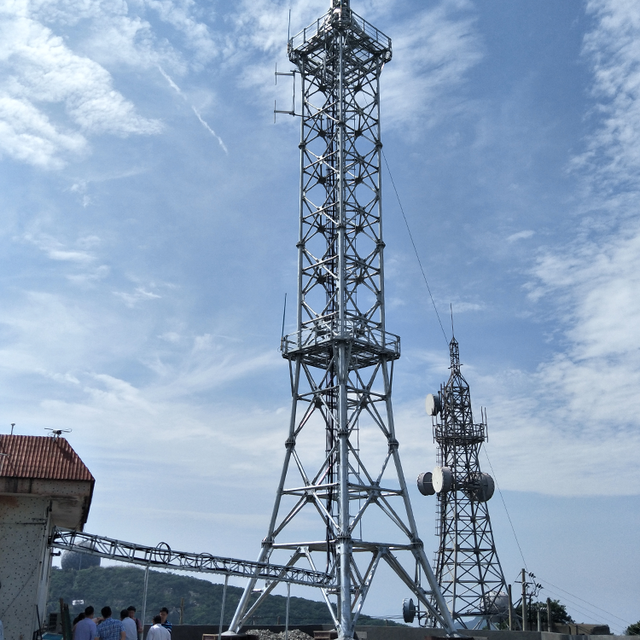
- Tower installations: Professional grounding system with multiple ground rods bonded together
- Lightning-prone areas: Redundant protection (arrestors + surge suppressors + UPS)
- Shared towers: Coordination with other tenants for unified grounding system
Lightning protection costs $150-300 for basic systems, $500-1500 for comprehensive protection. This is cheap insurance compared to equipment replacement costs.
Accessory 7: Uninterruptible Power Supply (UPS) or Generator
What It Does
UPS systems provide battery backup maintaining transmitter operation during brief power outages (minutes to hours depending on battery capacity). Generators provide extended backup power for longer outages (hours to days depending on fuel supply). Both systems protect equipment from damage caused by sudden power loss or voltage fluctuations.
Problems Without It
Power interruptions create multiple problems: lost broadcast time (dead air), listener complaints, revenue loss for commercial stations, equipment damage from sudden power loss or voltage spikes, and corruption of transmitter settings or firmware. Some events and emergencies require continuous operation—power backup transforms broadcast from "usually on" to "always on."
How to Choose
UPS selection:
- Capacity calculation: Transmitter power consumption × 1.3 = minimum UPS VA rating
- Example: 300W transmitter draws ~500W AC → need 650 VA minimum UPS
- Runtime requirements:
- 15-30 minutes: Small UPS sufficient for brief outages ($100-300)
- 1-4 hours: Large UPS or external battery pack ($300-1000)
- 4+ hours: Multiple battery packs or generator ($1000+)
- Waveform type: Pure sine wave essential for transmitters (simulated sine wave causes overheating)
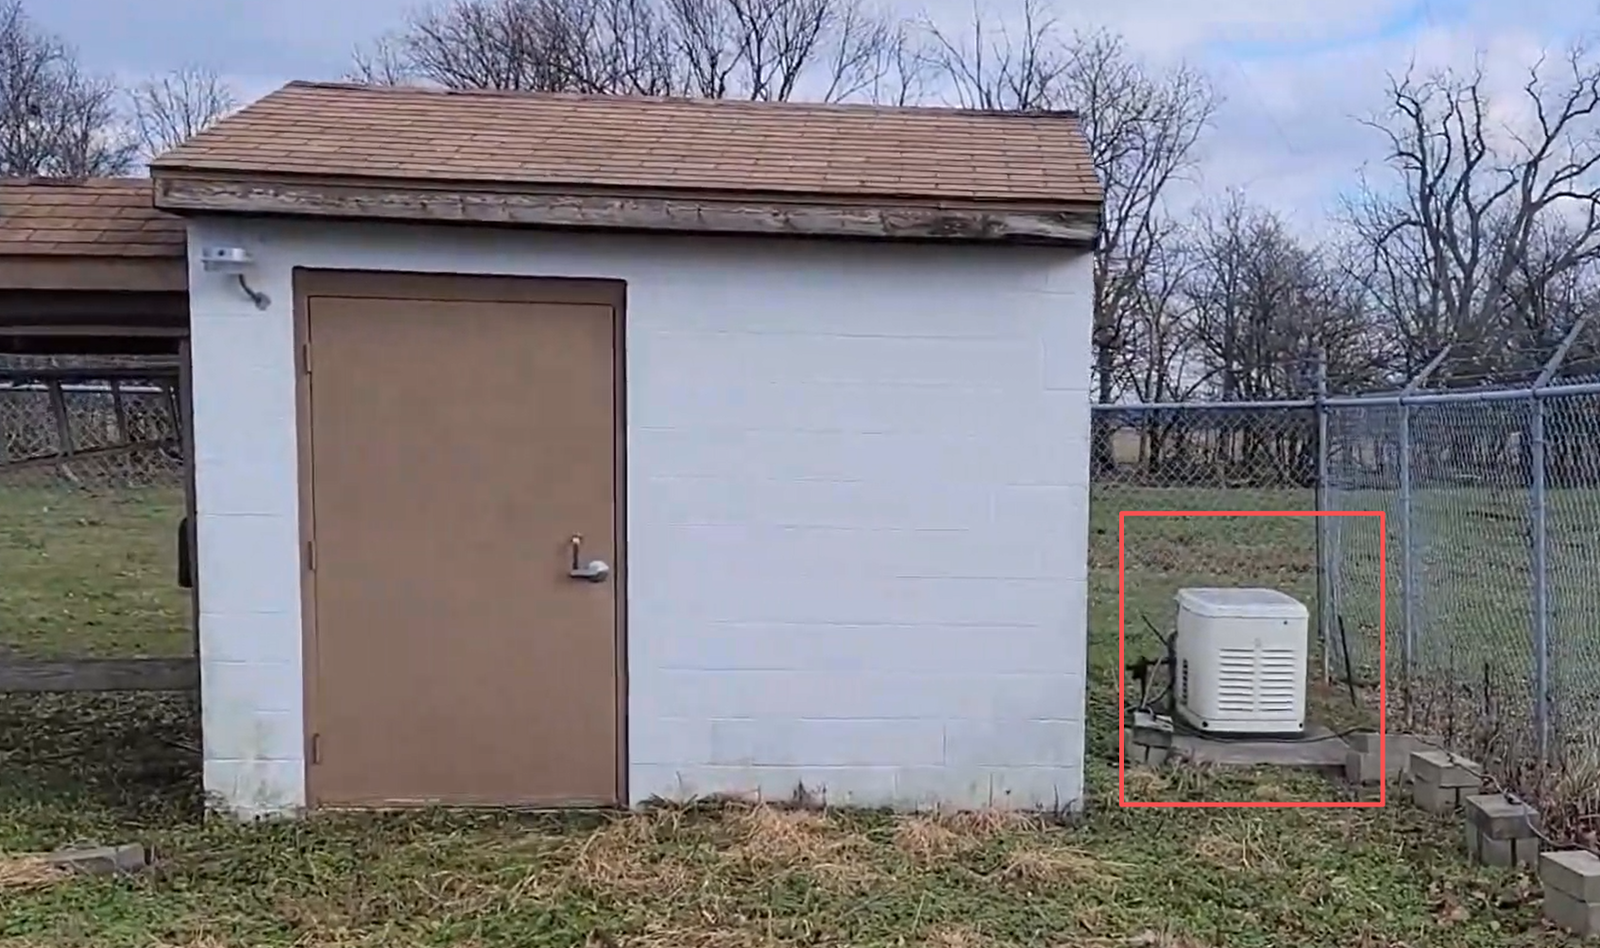
Generator considerations:
- Power capacity: 2× transmitter power consumption for safety margin and starting surge
- Fuel type: Propane (longest storage), gasoline (convenient), diesel (most efficient)
- Automatic transfer switch: Seamless cutover without broadcast interruption ($300-800)
- Maintenance: Regular testing, oil changes, fuel freshness checks
Which Scenario
- Urban areas with stable power: 30-minute UPS adequate ($150-300)
- Rural areas with frequent outages: 2-hour UPS + manual generator option ($400-800)
- Critical infrastructure (emergency, public safety): UPS + automatic generator ($2000-5000)
- Commercial broadcasters: Generator mandatory (backup UPS for switching)
Accessory 8: Equipment Rack and Cooling System
What It Does
Equipment racks organize components in standardized 19" mounting format, improving cooling, reducing cable clutter, and simplifying maintenance. Cooling systems (fans, ventilation) remove heat that reduces equipment lifespan and causes failures.
Problems Without It
Equipment scattered on shelves or stacked creates problems: inadequate cooling causes thermal shutdown and shortened lifespan; tangled cables complicate troubleshooting; non-standard mounting makes service difficult; and amateur installations appear unprofessional. Heat is the enemy—every 10°C temperature increase cuts electronic component lifespan in half.
How to Choose
Rack selection:
- Height: Count your equipment rack units (RU). Each RU = 1.75". Add 30% for future expansion
- Example: Transmitter (2 RU) + processor (1 RU) + UPS (2 RU) + patch panel (1 RU) = 6 RU → buy 8-12 RU rack
- Type:
- Open frame ($50-150): Budget option, less protection
- Cabinet ($200-600): Enclosed, lockable, better cooling control
- Wall-mount ($80-200): Space-saving for small systems
- Depth: Transmitters typically need 16-20" depth; verify before purchasing
Cooling requirements:
- Natural convection: Works for <200W total equipment (rack placement critical)
- Forced air: 100-200 CFM fan required for 200-500W equipment ($30-80)
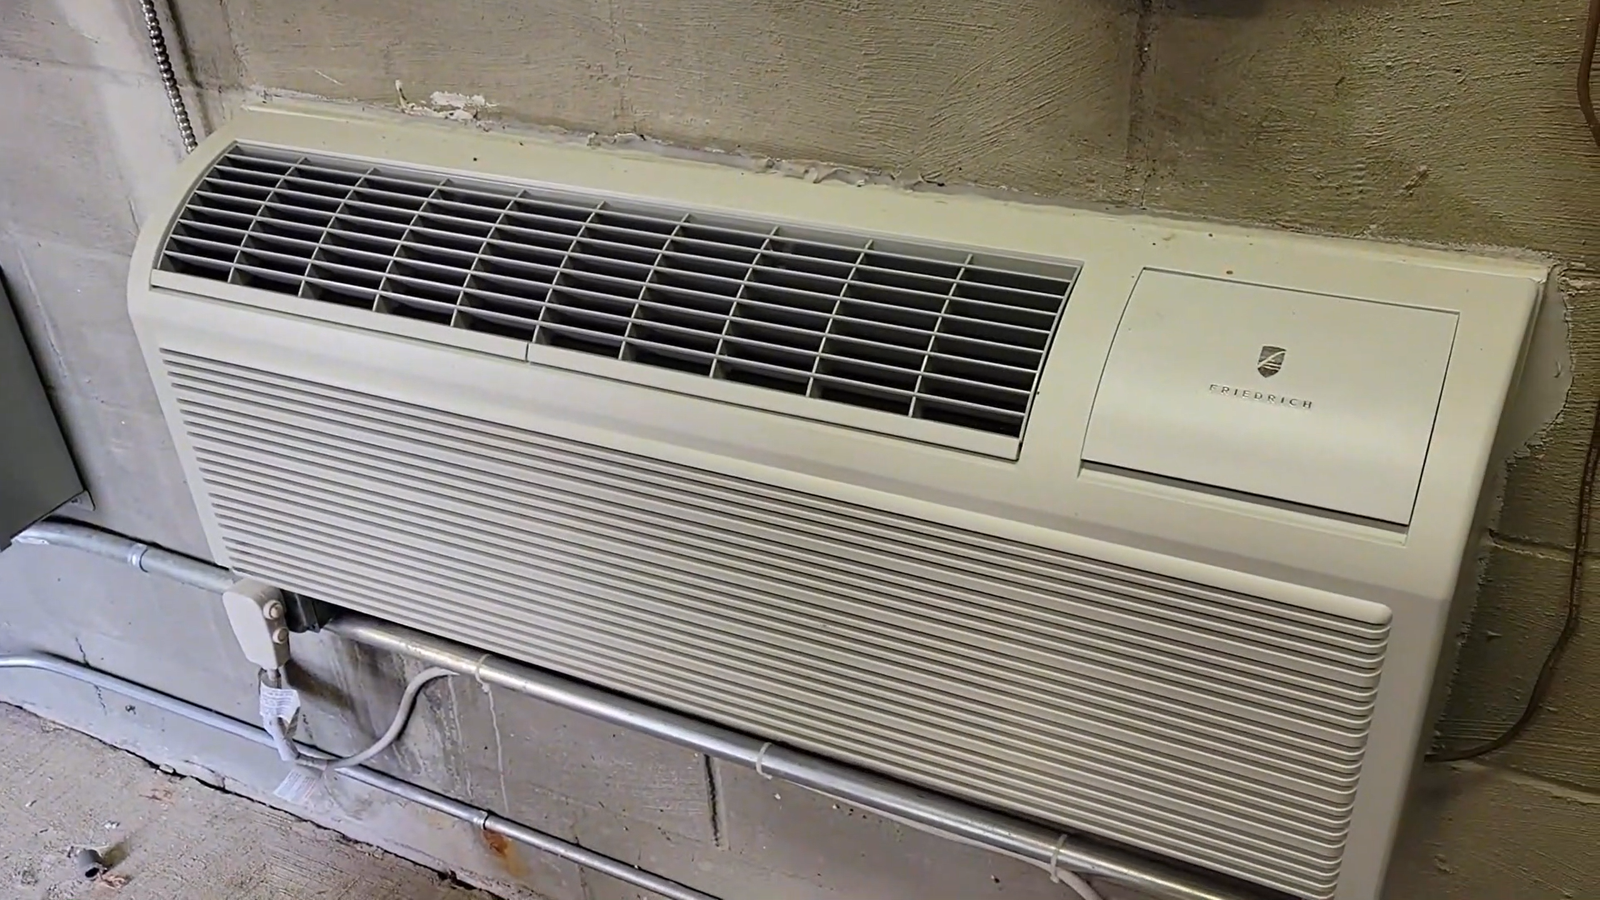
- AC climate control: Professional solution for >500W or critical applications ($300-2000)
Installation tips:
- Heavy equipment at bottom: Prevents tip-over, easier maintenance
- Hot exhaust at top: Heat rises; place transmitters high in rack
- Cable management: Use rack-mount patch panels and cable managers ($20-60)
- Ventilation: Maintain 15cm clearance around rack; don’t block vents
Which Scenario
- Small systems (<100W): Wall-mount rack sufficient
- Medium systems (100-500W): Floor-standing cabinet with fan cooling
- Large systems (>500W): Full cabinet with climate control
- Mobile systems: Shock-mount rack cases ($150-400)
I visited a station with transmitter and equipment piled on a desk—internal temperature measured 68°C (ambient 28°C). They were replacing transmitters every 2-3 years. We installed proper rack with fan cooling (cost: $280). Equipment internal temperature dropped to 42°C. Original transmitter is still running 5 years later.
Accessory 9: Remote Monitoring and Control System
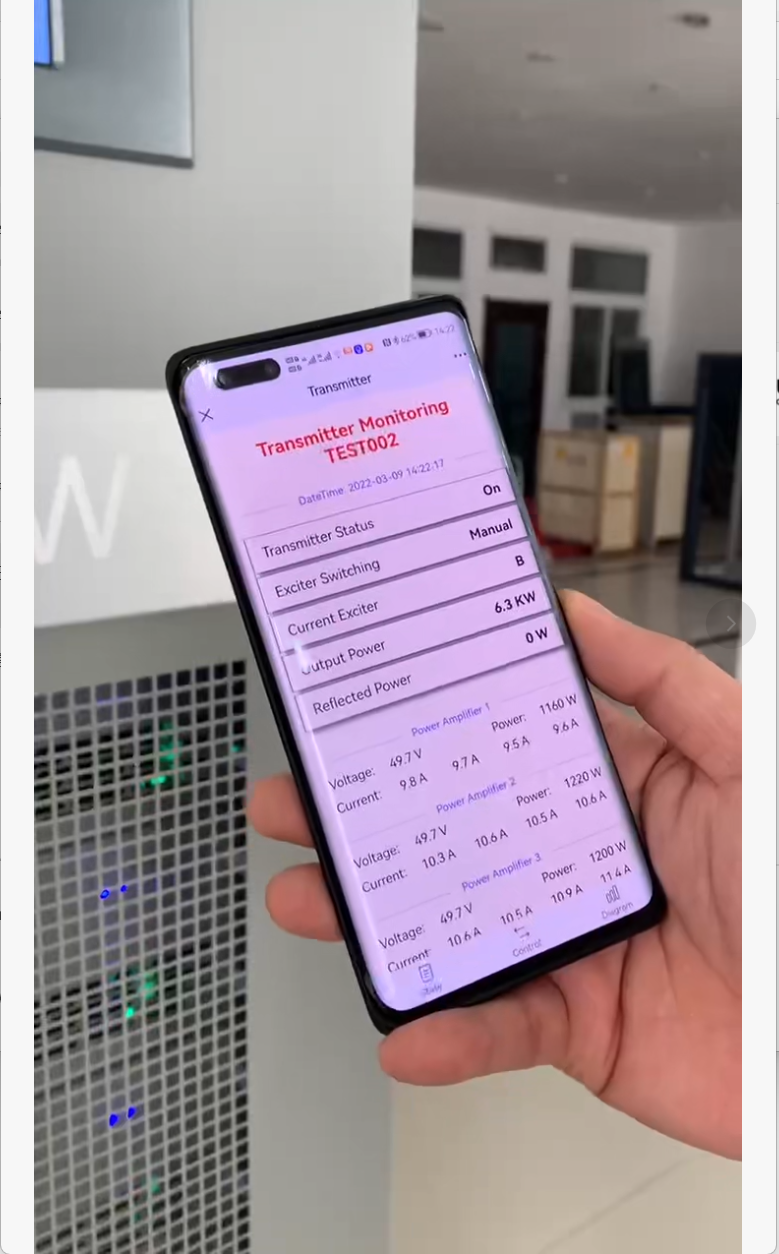
What It Does
Remote monitoring systems provide network or cellular access to transmitter status, allowing you to check operation, receive alerts, adjust settings, and troubleshoot problems from anywhere. Advanced systems include power control (remote restart), status logging, and integration with automation software.
Problems Without It
Without remote access, you only discover problems when listeners complain or you physically visit the transmitter site. Overnight failures mean hours of dead air before you drive to the site. Intermittent problems are difficult to diagnose without continuous monitoring data. For unattended or remote sites, every problem requires a site visit.
How to Choose
Monitoring levels:
| System Type | Features | Cost | Best For |
|---|---|---|---|
| Basic email alerts | Status reports only | $0-50 | Manual monitoring |
| Web interface | Real-time status, alerts | $150-400 | Small operations |
| Full control | Remote adjustments, power control | $400-1200 | Professional stations |
| Integrated automation | Complete system integration | $1000+ | Unattended/automated |
Key features to look for:
- Alerts: Email, SMS, or app notifications for faults
- Measurements: Forward/reflected power, temperature, voltage, modulation level
- Remote power control: Ability to restart transmitter or equipment remotely
- Data logging: Historical data for trend analysis and maintenance planning
- Security: Password protection, encrypted access
- Connectivity: Ethernet preferred, cellular backup option
Which Scenario
- Attended facilities: Basic monitoring sufficient (check status periodically)
- Remote sites: Full control capability essential (avoid unnecessary site visits)
- Automated operations: Integrated system with computer control
- Multiple sites: Centralized monitoring of entire network
- Hobbyist systems: Simple status-only monitoring adequate
Modern RS transmitters (100W+) include Ethernet connectivity and web-based monitoring as standard features. Adding SMS alerts costs $150-300 for third-party service.
Accessory 10: RDS Encoder (Optional but Valuable)
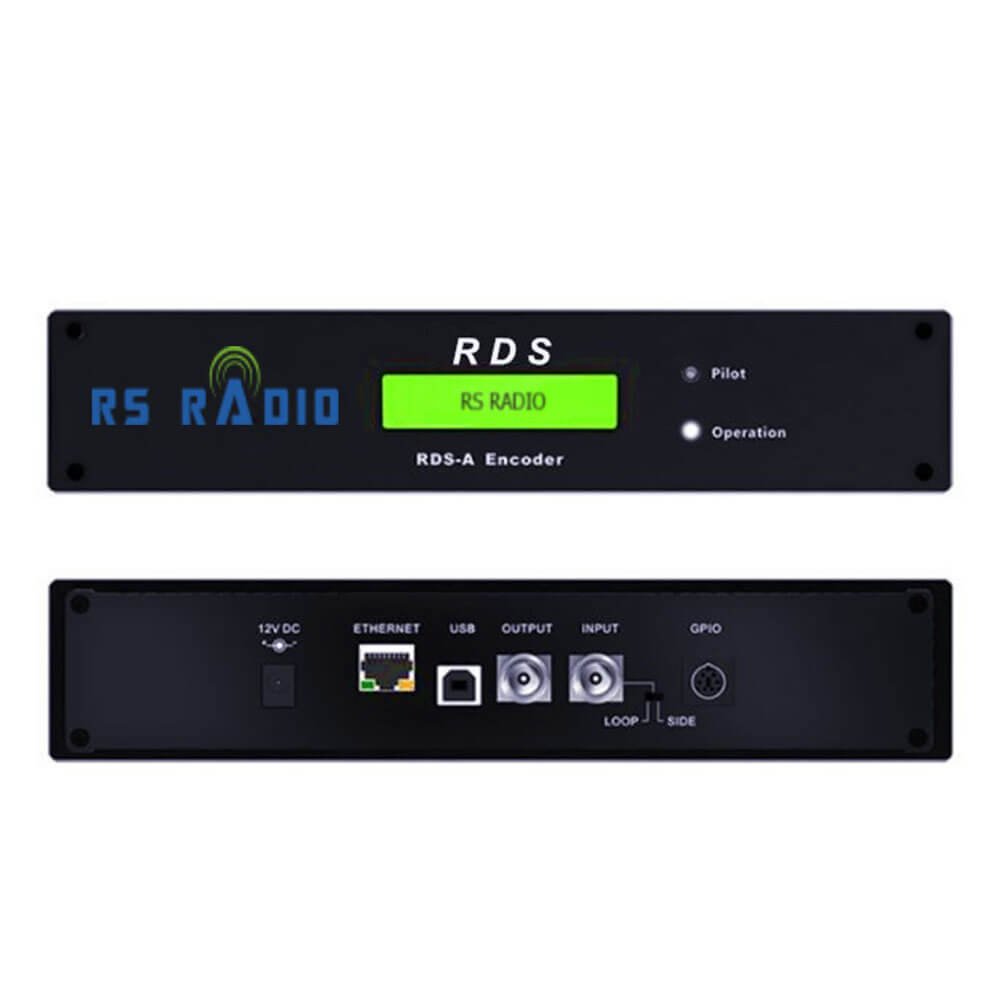
What It Does
RDS (Radio Data System) transmits text and data alongside your audio signal. This displays station name, song title, artist information, traffic alerts, and other data on compatible receivers. It’s standard in Europe and increasingly common worldwide, improving listener experience and station professionalism.
Problems Without It
Without RDS, listeners see only your frequency number (like "90.5 MHz") instead of station name. They can’t identify your station when scanning. Modern car stereos and receivers show competitors’ station names and song information while your station shows generic frequency. You miss opportunities for:
- Station branding (call letters and slogan displayed continuously)
- Song/artist information (improves listening experience)
- Traffic and emergency alerts (public service)
- Program type identification (helps listeners find content)
How to Choose
RDS encoder types:
- Standalone hardware: Dedicated RDS encoder box ($200-800)
- Integrated in transmitter: Many modern transmitters include basic RDS ($0 extra)
- Computer software: USB devices with PC software control ($150-400)
- Professional: Network-connected with automation integration ($800-2000)
Essential RDS features:
- PS (Program Service): Station call letters/name
- RT (Radio Text): Song titles, artist names, custom messages (64 characters)
- PTY (Program Type): Content category (news, rock, classical, etc.)
- CT (Clock Time): Synchronizes receiver clocks
- TA/TP (Traffic): Traffic announcement flags
- AF (Alternative Frequencies): Alternate frequencies for same station
Which Scenario
- Music stations: RT (song/artist info) most valuable feature
- News/talk: PS (station name) and PTY (program type) priority
- Multiple transmitters: AF (alternative frequencies) guides listeners to best signal
- Emergency broadcasts: TA flag for traffic/emergency alerts
- Modern markets: RDS becoming expected feature; listeners notice absence
Entry-level RDS costs $150-300 and transforms listener experience. Professional encoders with automation integration cost $800-1500 but worth it for serious operations.
Common Accessory Mistakes to Avoid
Mistake 1: Buying transmitter first, antenna last
Many operators spend 80% of budget on transmitter, leaving $50 for antenna. Better: Allocate 60% to transmitter, 40% to accessories (mostly antenna/cable). A $600 transmitter with $400 accessories outperforms a $900 transmitter with $100 accessories.
Mistake 2: Cheap cable "to save money"
RG-58 cable costs $0.80/meter less than LMR-400. For 30m run, you "save" $24. But you lose 40% of your signal (see Accessory 2). Spending $24 extra delivers power equivalent to $200 transmitter upgrade. Always buy quality cable.
Mistake 3: No lightning protection "because I’m not on a tower"
Even low-height antennas attract lightning. Protection costs $80-150. Transmitter replacement costs $1500-5000. Every outdoor antenna installation needs lightning protection, period.
Mistake 4: Skipping audio processing "because I have good audio"
Unprocessed audio sounds fine in the studio but lacks punch on air. Stations with processing sound noticeably louder and clearer. Listeners tune away from quiet stations. Even basic $150 processing makes dramatic difference.
Mistake 5: No monitoring receiver
You can’t optimize what you can’t measure. Without monitoring your actual broadcast signal, you’re flying blind. A $50-100 receiver saves thousands in improved performance and early problem detection.
Final Thoughts: Accessories Make the Difference
I’ve diagnosed hundreds of FM systems over the years. The difference between disappointing systems and excellent ones isn’t the transmitter—it’s the accessories. A modest 100W transmitter with excellent accessories outperforms a 300W transmitter with poor accessories every time.
Start with the essentials (antenna, cable, lightning protection), add quality audio processing as budget allows, then invest in reliability and monitoring. Your listeners will hear the difference, and your operation will be more professional and stable.
Next Steps:
- Audit your current system against this checklist
- Prioritize upgrades based on biggest gaps
- Budget for quality components rather than cheap alternatives
- Plan installation properly the first time
The investment in proper accessories pays back through better coverage, higher audio quality, improved reliability, and lower long-term costs. Build your system right from the start.