5 Common FM Transmitter Mistakes That Reduce Coverage
How to Fix Signal Problems and Maximize Your Broadcasting Range
I’m a technical engineer at RS, and over the past 8 years I’ve diagnosed hundreds of FM coverage problems. Maybe you installed a 100W transmitter expecting 10 km coverage but barely reaching 5 km. Or listeners complain about weak signals in areas that should receive strong signals. Most coverage problems aren’t equipment failures—they’re installation and configuration mistakes that quietly eat away your broadcasting range.
This guide covers five technical errors I see repeatedly in field deployments. Each mistake significantly reduces coverage, but fixing them costs little or nothing.
Mistake 1: Setting Transmitter Power Too High or Too Low
The Problem You Notice
Your coverage seems inconsistent—strong in some areas, weak in others that should receive good signals. Or you’re burning through transmitters faster than expected, with overheating problems and shortened equipment life.
The Root Cause
I see two opposite mistakes with power settings:
Over-Powering: Some operators think "more power = better coverage" and max out transmitter settings. A 300W transmitter designed for 300W operation pushed to 350W for "extra coverage" actually reduces coverage through several mechanisms:
- Excessive heat degrades amplifier linearity, creating distortion that receivers interpret as noise, reducing effective range
- Harmonic distortion increases as amplifiers run beyond optimal operating points, violating spectrum masks and reducing main signal power
- Component stress accelerates failure rates, causing intermittent coverage drops
Last month I diagnosed a station complaining about "declining coverage." Their 500W transmitter was configured for 600W output. Actual radiated power? Only 420W due to amplifier distortion and protection circuits engaging. After resetting to proper 500W, measured coverage increased 15%.
Under-Powering: Others operate transmitters at reduced power thinking it saves energy or extends equipment life. A 1000W transmitter running at 600W seems conservative, but modern transmitters optimize efficiency at rated power. Running significantly below rated power often reduces efficiency percentage, increasing electricity cost per watt radiated.
The Fix
Match power to antenna system: Measure your antenna system’s actual power handling. If you have an antenna rated for 300W, don’t install a 500W transmitter hoping to "upgrade later." Mismatched power creates standing waves reducing coverage.
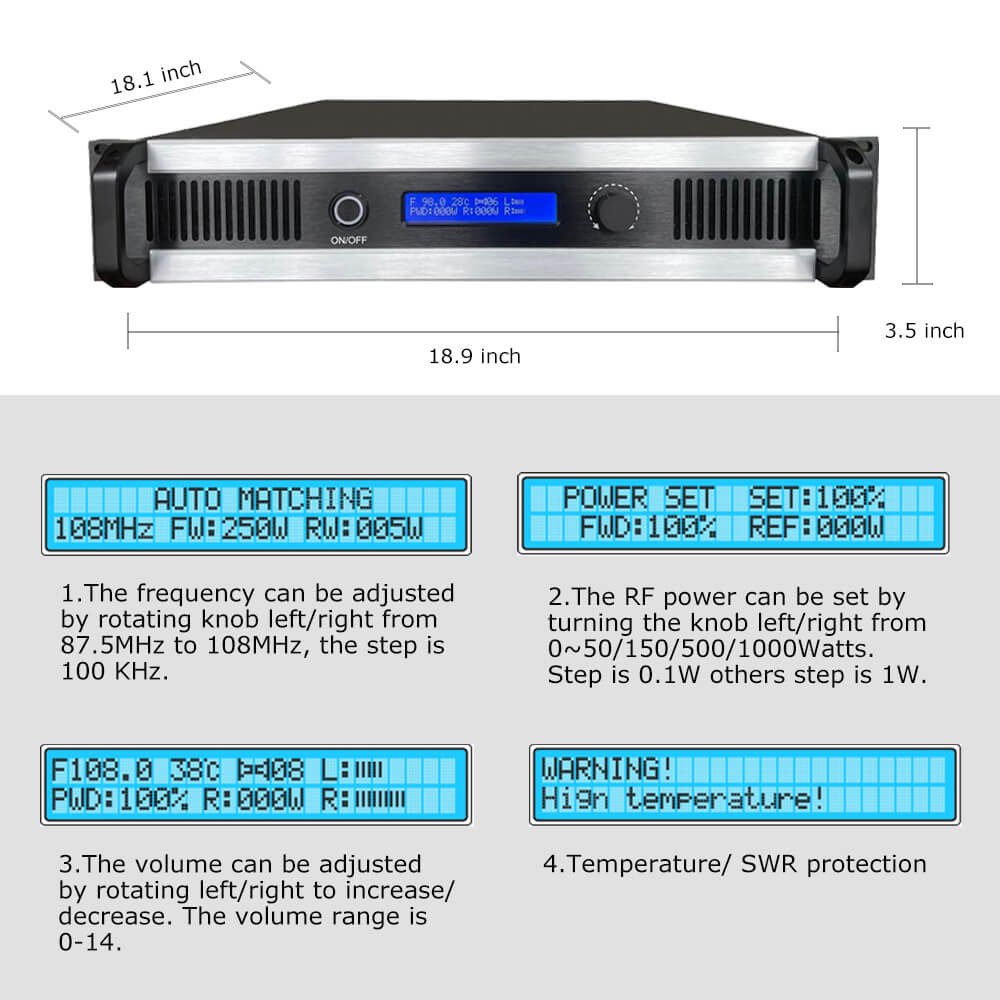
Use manufacturer-specified power: Transmitters are engineered for optimal performance at rated power. RS transmitters achieve 60-65% efficiency at rated power, dropping to 50-55% when operated 40% below rating. This costs more in electricity while delivering less coverage.
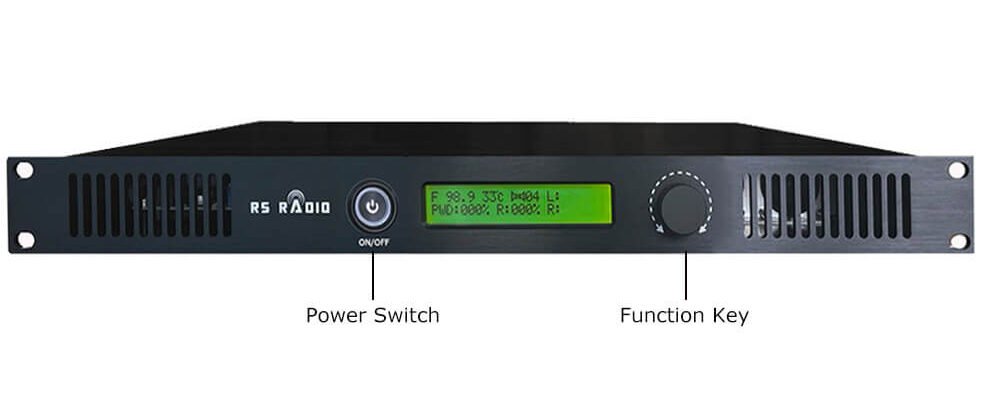
Monitor forward and reflected power: Install a dual-direction RF power meter (cost: $80-150). Watch for reflected power exceeding 5% of forward power. Higher reflection indicates antenna system problems reducing coverage regardless of transmitter power.
Adjust for altitude: High-altitude installations (above 2000m) require power derating due to reduced cooling air density. Reduce power 10% for each 1000m above 2000m elevation.
Common Misconception
"Higher power always means better coverage." Reality: A 100W transmitter with excellent antenna system outperforms a 300W transmitter with poor antenna placement. I’ve measured this repeatedly—antenna height and positioning matter more than power after reaching minimum threshold levels.
Mistake 2: Installing Antennas at Ground Level or With Obstructions
The Problem You Notice
Coverage seems okay in immediate vicinity (1-2 km) but drops off dramatically beyond that. Listeners report signal loss when trees, buildings, or hills come between them and your transmitter. Coverage maps predicted 15 km but you’re barely reaching 7 km.
The Root Cause
FM signals propagate similarly to light—they travel in straight lines and can’t bend around large obstacles. Every meter of antenna height adds several kilometers of potential coverage. Yet I regularly encounter transmitters with antennas installed:
- On ground-level poles (3-5m height): Maximum theoretical coverage for 100W transmitter at 5m height is approximately 8 km on flat terrain
- Below roofline: Buildings block signals in all directions except directly upward
- Near large trees: Foliage absorbs FM signals, particularly when wet. A large tree 5m from antenna reduces signal 6-10 dB in that direction
- In valleys: Surrounding terrain blocks signals to distant areas
I evaluated a community station with 300W transmitter reaching only 8 km. Their antenna was mounted on a 6m pole behind their building. We relocated the antenna to the building roof (12m total height), identical transmitter power. New coverage: 18 km. Installation cost: $300 for mounting hardware and cable.
The Fix
Calculate line-of-sight distance: Radio horizon distance (in km) ≈ 4.12 × √(height in meters). For example:
- 10m antenna height = 13 km radio horizon
- 20m antenna height = 18 km radio horizon
- 30m antenna height = 23 km radio horizon
- 50m antenna height = 29 km radio horizon
This is theoretical maximum on flat terrain. Actual coverage is typically 60-80% of radio horizon distance.
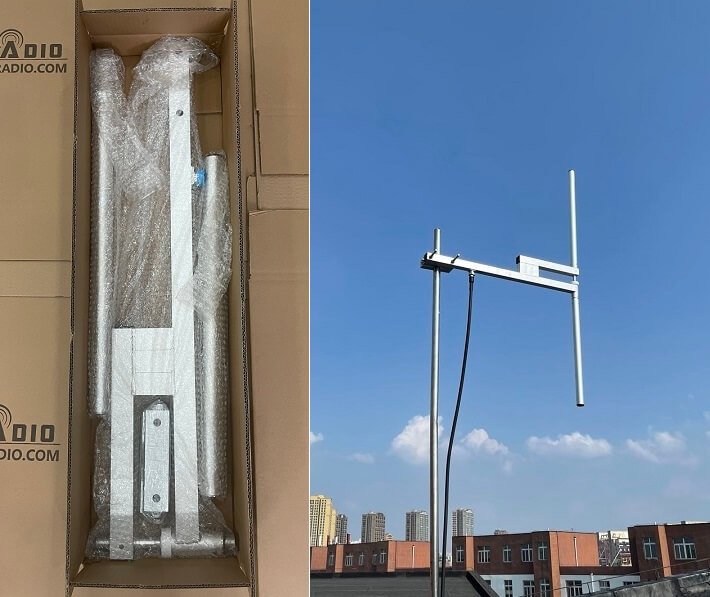
Mount antennas as high as practically possible:
- Rooftop installations: Use tallest building available. Even modest buildings (10-15m) dramatically outperform ground-level poles
- Towers: Purpose-built antenna towers deliver best results. A 30m tower costs $3,000-8,000 but transforms coverage
- Existing structures: Negotiate mounting on tall structures like water towers, grain silos, or communication towers (rental: $200-800/month)
Clear obstruction zones: Maintain clear area around antenna. Remove or trim trees within 15m. Avoid mounting antennas near:
- Metal buildings or large metal objects (reflect signals unpredictably)
- Dense tree lines (absorb and scatter signals)
- Tall buildings blocking signals in target directions
Survey the site professionally: Before installing towers or permanent structures, conduct proper site surveys. I use professional propagation modeling software (free options: Radio Mobile, CloudRF) accounting for terrain, obstacles, and antenna height. This prevents expensive mistakes.
Real Example: A religious broadcaster in mountainous terrain installed 500W transmitter with antenna at 15m height. Coverage: 12 km due to surrounding ridges. We identified a hilltop location 8 km away, installed 300W transmitter with antenna at 45m effective height (accounting for elevation). New coverage: 28 km with 40% less power. The height advantage overcame the power reduction.
Common Misconception
"I’ll start with a low antenna and upgrade later if needed." Problem: Antenna installation costs (tower construction, cable runs, permits) typically exceed transmitter costs. Installing properly from the start costs less than doing it twice. I recommend investing 60% of budget in antenna system, 40% in transmitter for optimal long-term value.
Mistake 3: Using Wrong Antenna Type or Poor Impedance Matching
The Problem You Notice
Your transmitter shows full power output but coverage is disappointing. Or you notice the transmitter running hot, even though power settings seem correct. SWR (Standing Wave Ratio) warning lights occasionally illuminate.
The Root Cause
Antenna selection and system matching are technical topics many broadcasters overlook. I find three common errors:
Using inappropriate antenna types:
- Simple wire antennas (coat hangers, random wire): These radiate unpredictably with deep nulls in coverage pattern. I measured a "dipole" made from speaker wire showing 15 dB variation between strongest and weakest directions—coverage varied from 8 km to less than 2 km depending on direction
- Indoor antennas: FM signals attenuate 15-25 dB passing through building materials. A 100W transmitter with indoor antenna performs like 5W transmitter outdoors
- Wrong polarization: Most FM broadcast uses circular or vertical polarization. Using horizontal-only antennas reduces mobile reception (car antennas are typically vertical)
Impedance mismatches: FM transmitters output 50Ω impedance. Antenna systems must also present 50Ω impedance. Mismatches cause:
- Reflected power: Power bounces back to transmitter instead of radiating, reducing coverage and potentially damaging equipment
- Increased heat: Reflected power dissipates as heat in transmitter finals
- Distortion: Mismatches affect transmitter linearity
Last week I diagnosed a station showing 300W forward power but only 180W effective radiated power. Their antenna system measured 75Ω impedance (should be 50Ω). After installing proper matching network, effective radiated power increased to 270W—same transmitter, 50% coverage improvement.
Poor grounding and lightning protection: Inadequate grounding creates:
- Common-mode currents on coax shield, distorting antenna patterns
- Static buildup creating noise and intermittent coverage drops
- Lightning vulnerability risking equipment destruction
The Fix
Select appropriate professional antennas:
- Dipole antennas: Simple, inexpensive ($40-120), omnidirectional, good for flat terrain with no specific directional needs
- Ground plane (GP) antennas: Vertical polarization, omnidirectional, excellent for mobile reception ($60-180)
- Yagi/directional antennas: Focus energy in specific directions, doubling coverage in target direction while reducing coverage behind antenna ($120-350)
- Circular polarized antennas: Professional choice, equal signal to vertical and horizontal receivers, reduces multipath ($200-600)
Match antenna gain to application:
- 0 dBd gain: Omnidirectional, equal coverage all directions
- 3 dBd gain: Slightly flattens vertical pattern, increases horizontal reach 40%
- 6 dBd gain: Significantly flattens pattern, increases horizontal reach 100% but reduces sky coverage (not suitable for mountainous terrain)
For 100W transmitter example:
- Basic dipole (0 dBd): 100W ERP, 8-10 km coverage
- 3 dBd antenna: 200W ERP, 12-14 km coverage (same transmitter!)
- 6 dBd antenna: 400W ERP, 16-18 km coverage (same transmitter!)
Verify impedance matching:
- Measure SWR: Should be below 1.5:1 across your frequency ±200 kHz. Above 2:1 indicates significant mismatch requiring correction
- Use quality coaxial cable: Impedance-matched 50Ω cable (RG-8, RG-213, or LMR-400)
- Minimize cable length: Every 10m of RG-8 cable loses approximately 1.5 dB at FM frequencies. Use shortest practical cable run
Install proper grounding:
- Ground rod at antenna base: <10Ω resistance, connected to coax shield
- Coax lightning arrestor: Installed at antenna and building entry points ($30-80 each)
- Single-point ground: All equipment grounds connect to common point
Common Misconception
"Any antenna works if it’s resonant at my frequency." Partially true—resonance helps, but antenna type, gain, polarization, and pattern matter enormously. I’ve seen resonant antennas with terrible patterns delivering 30% of expected coverage. Invest in proper professional antennas designed specifically for FM broadcast.
Mistake 4: Operating on Crowded or Interfered Frequencies
The Problem You Notice
Coverage seems adequate close to transmitter but listeners report interference, alternating signals, or poor audio quality at moderate distances. Or your coverage suddenly degraded when another station started operating nearby.
The Root Cause
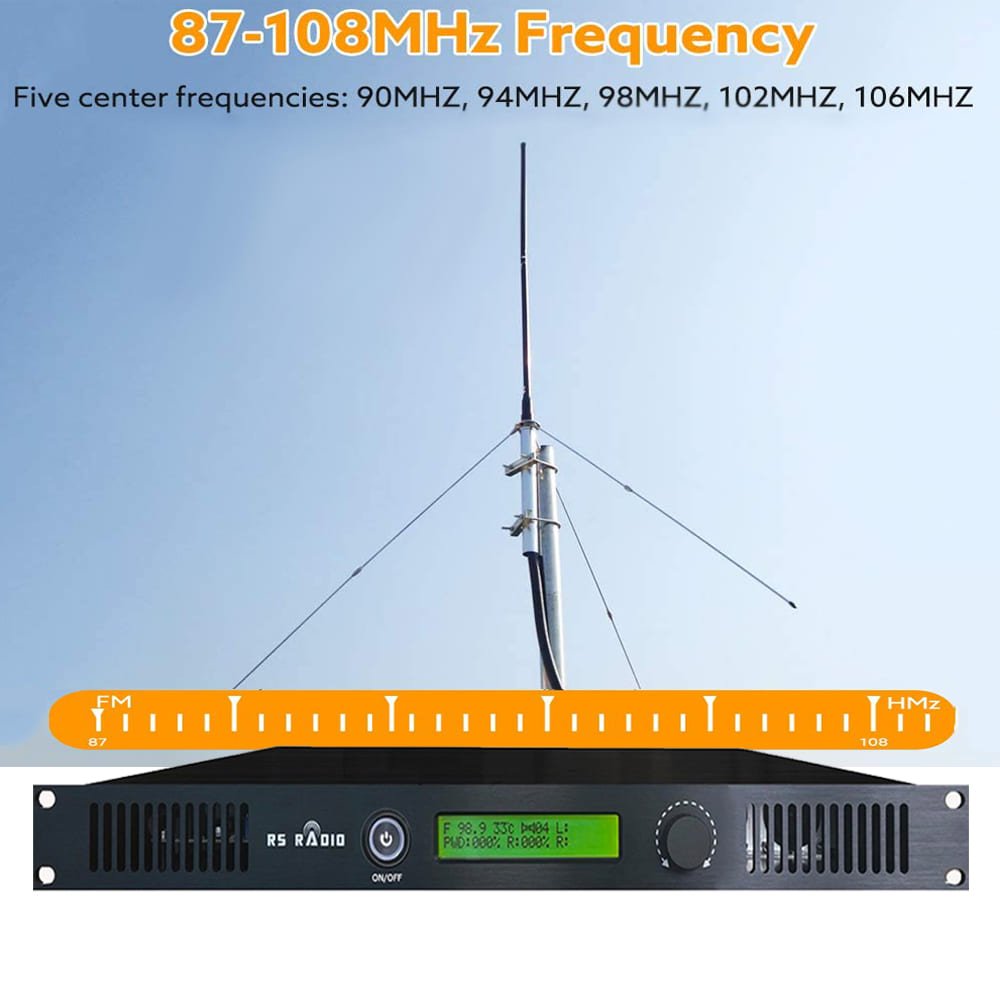
FM broadcasting operates in a shared spectrum (88-108 MHz). Your signal competes with other broadcasters, and receiver behavior determines which signal wins. I regularly diagnose coverage problems caused by:
Co-channel interference: Another station operating on your exact frequency within capture range. FM receivers lock to stronger signal, switching between stations as relative signal strengths change. This creates a "battleground" area where neither station provides reliable coverage.
Adjacent channel interference: Stations on frequencies ±200 kHz from yours. Professional receivers reject adjacent channels well, but cheap receivers (car stereos, portable radios) have poor selectivity. Adjacent strong signals reduce your effective coverage by creating noise.
Intermodulation: Multiple strong signals combining in receiver front-ends creating false signals. If strong stations operate at 90.5 MHz and 91.5 MHz, receivers may generate false signals at 89.5 MHz and 92.5 MHz, interfering with legitimate stations on those frequencies.
I evaluated a community broadcaster in suburban area. They operated on 89.7 MHz with 100W transmitter and complained about poor coverage (only 6 km). Spectrum analysis revealed a 50 kW commercial station 45 km away also on 89.7 MHz. The commercial station’s signal reached the community at moderate levels, creating interference zone where neither station provided clean reception. After relocating to 90.9 MHz (clear frequency), coverage improved to 11 km—same equipment, doubled coverage.
The Fix
Conduct thorough spectrum survey before selecting frequency:
- Scan entire FM band (88-108 MHz) at your broadcast location using quality receiver and directional antenna
- Document signal strengths: Note all stations with signals stronger than -70 dBm
- Check FCC database (USA) or equivalent regulatory database for licensed stations in your region
- Identify clear channels: Look for frequencies with no stations within 50 km (low power) or 100 km (high power)
Apply frequency separation rules:
- Co-channel spacing: Minimum 70-100 km between stations on same frequency
- Adjacent channel spacing (±200 kHz): Minimum 30-50 km
- Second adjacent spacing (±400 kHz): Minimum 10-20 km
Consider geographic protection: Mountains and terrain provide natural interference shielding. A 30 km mountain range between your station and another co-channel station might allow closer spacing than possible on flat terrain.
Test candidate frequencies before committing:
- Temporarily operate on candidate frequency at low power
- Drive coverage area with monitor receiver measuring signal quality
- Check for interference from other stations or non-broadcast sources
- Confirm chosen frequency remains clean throughout intended coverage area
Coordinate with nearby broadcasters: Professional courtesy prevents problems. Contact stations on adjacent frequencies, explain your plans, and discuss potential interference. Most broadcasters appreciate advance notice and cooperate to minimize mutual interference.
Real Example: A university radio station planned 50W transmitter on 88.3 MHz. Pre-installation spectrum survey revealed strong commercial station 35 km away on 88.5 MHz (first adjacent). We tested 88.3 MHz with temporary low-power setup and found significant interference in southwest coverage area. After shifting to 89.1 MHz (much cleaner), the station achieved full expected coverage with no interference complaints.
Common Misconception
"If I can’t hear other stations on a frequency, it’s available." Wrong. Weak signals below your hearing threshold still interfere at greater distances. Professional spectrum analyzers detect signals -90 dBm or weaker—far below audibility but strong enough to interfere with your coverage. Proper frequency selection requires test equipment, not just casual listening.
Mistake 5: Neglecting Feedline Quality, Connections, and Maintenance
The Problem You Notice
Coverage gradually declines over months or years despite no obvious changes. Or coverage seems inconsistent—good some days, poor others. Periodic dropouts occur for no apparent reason. Power meter shows good forward power but actual coverage doesn’t match expectations.
The Root Cause
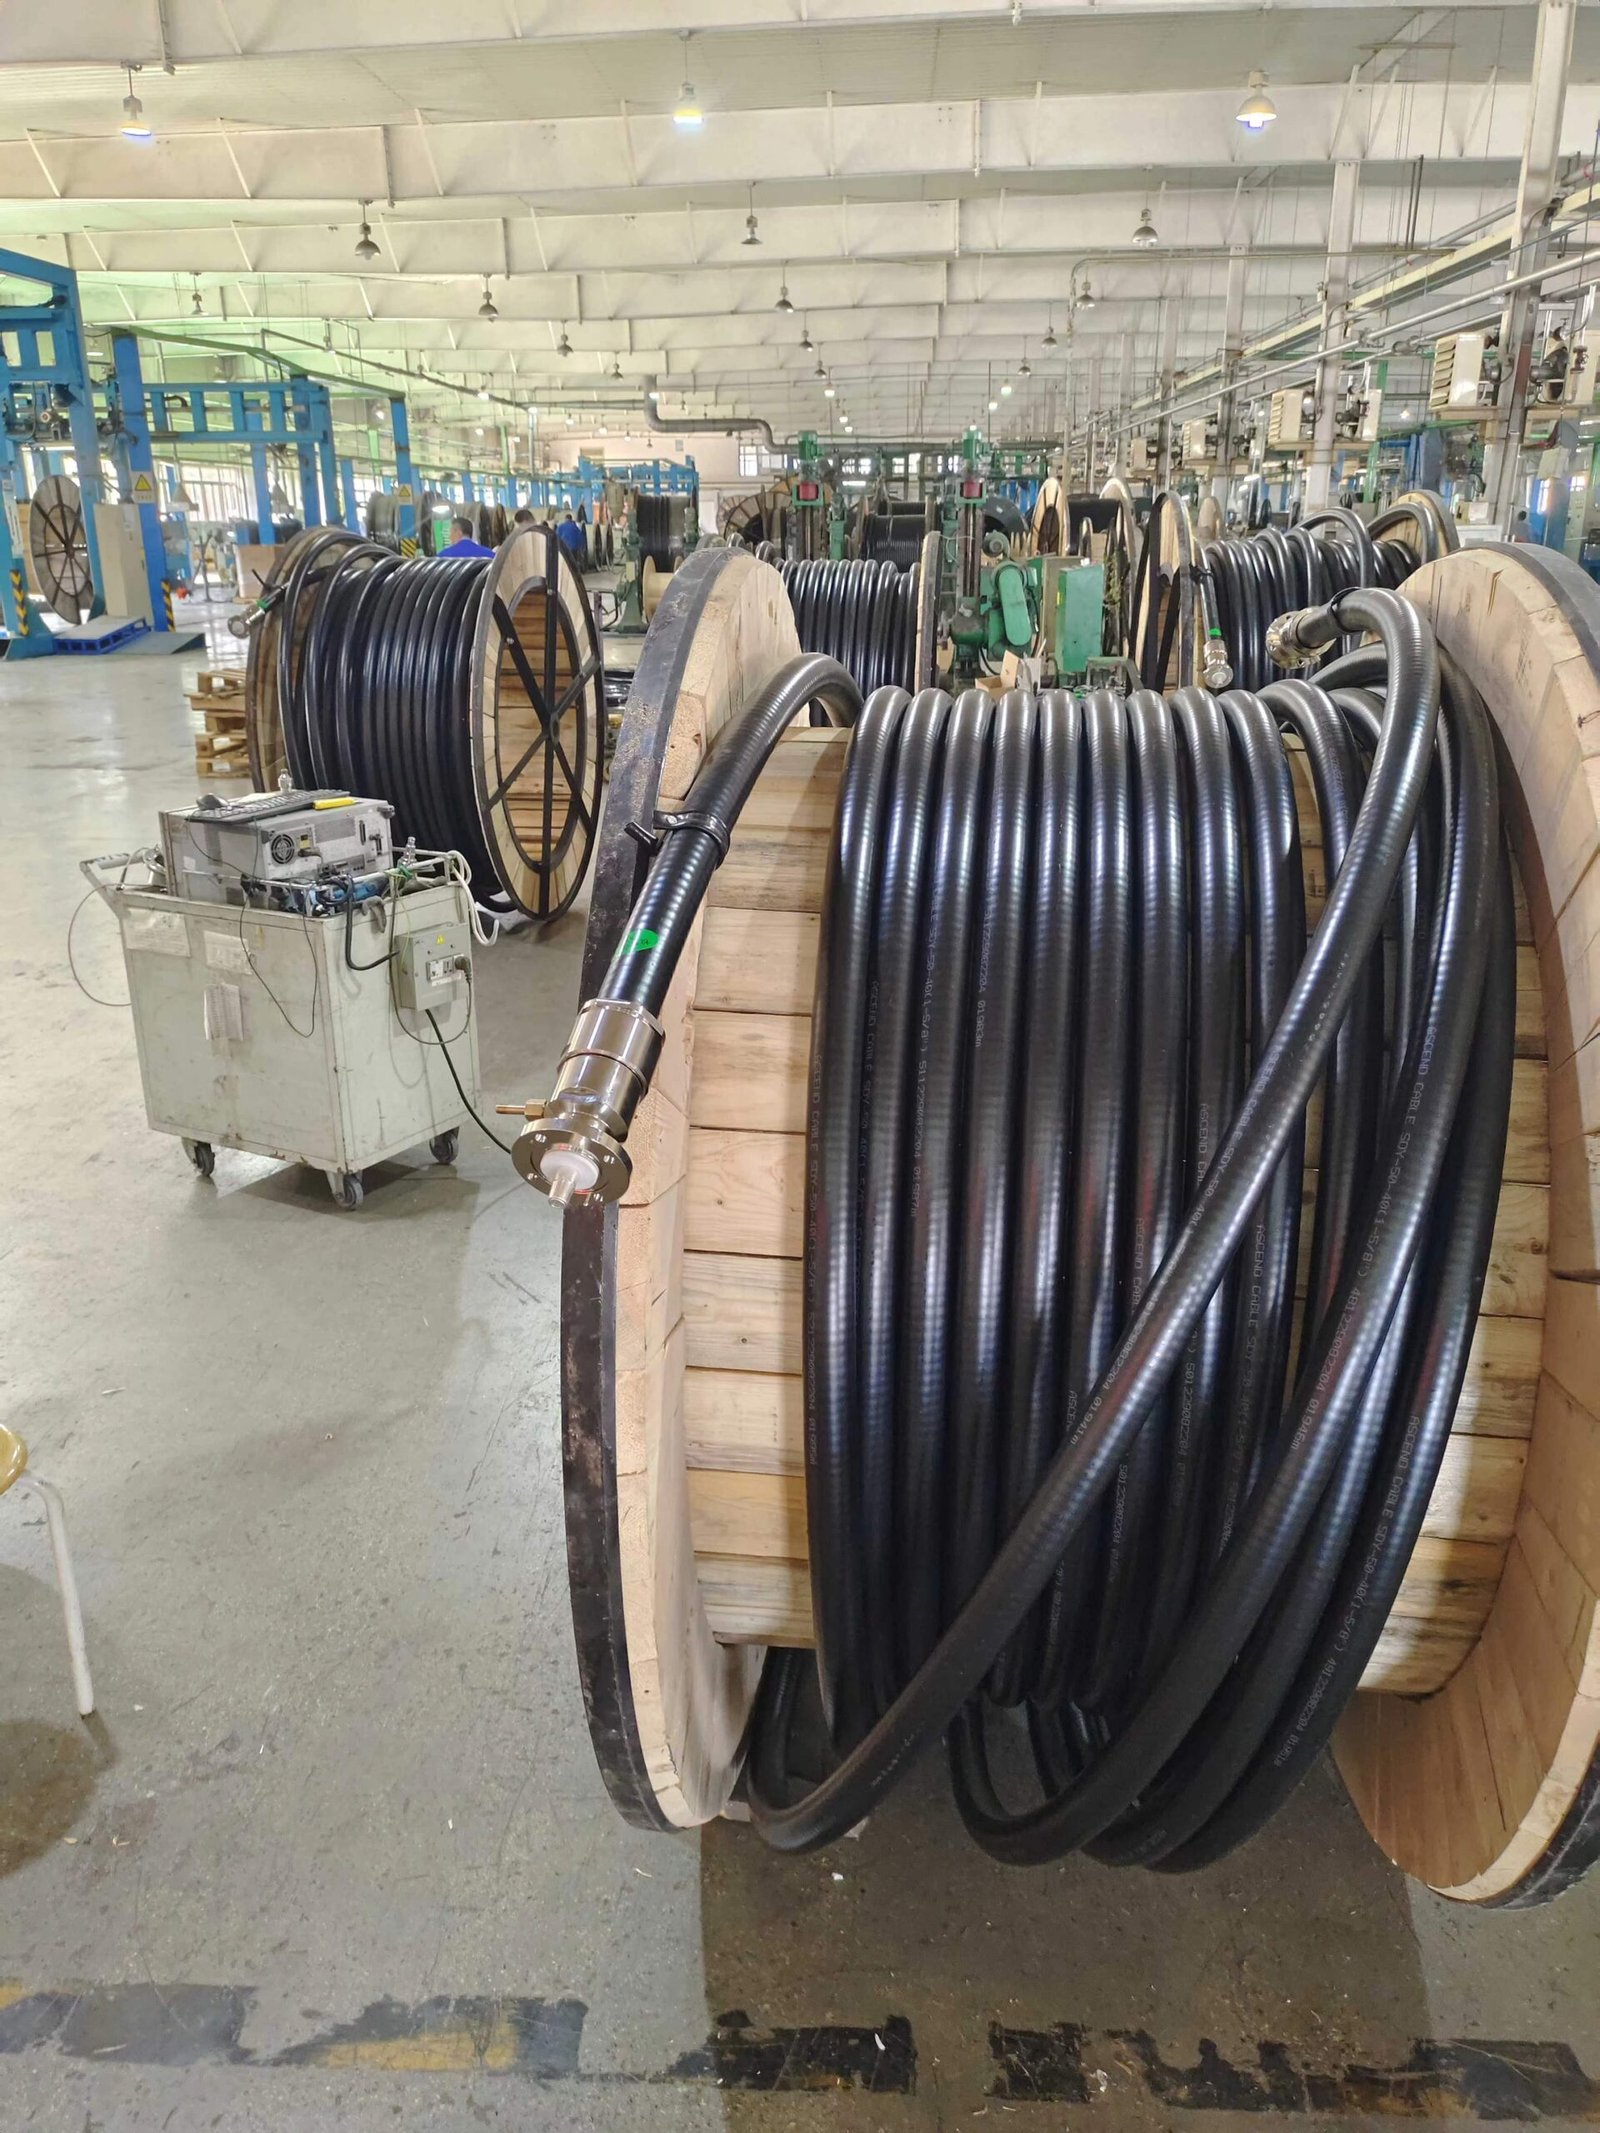
Coaxial cable and connections between transmitter and antenna silently lose efficiency over time. I diagnose these issues regularly, finding:
Feedline losses accumulating: Coaxial cable has inherent loss that increases with:
- Frequency: Higher frequencies lose more (FM at 88-108 MHz has higher loss than AM)
- Cable length: Longer runs accumulate more loss
- Cable type: Cheap cable loses significantly more than quality cable
- Age and weather exposure: UV degradation, moisture intrusion, and oxidation increase loss over years
Loss comparison for 30m cable run at 100 MHz:
| Cable Type | Loss per 30m | 100W Transmitter Power at Antenna | Coverage Impact |
|---|---|---|---|
| RG-58 (thin coax) | -6.0 dB | 25W (75W lost in cable!) | Terrible |
| RG-8 (standard coax) | -2.1 dB | 62W | Significant loss |
| LMR-400 (quality coax) | -1.2 dB | 76W | Moderate loss |
| 1/2" hardline | -0.6 dB | 87W | Minimal loss |
Many low-power installations use RG-58 because it’s cheap and flexible. But for a 100W transmitter with 30m cable run, RG-58 loses 75W in the cable—you’re radiating only 25W! Upgrading to LMR-400 triples your effective radiated power without changing the transmitter.
Connection problems: Poor connections cause:
- Intermittent contact: Creates noise, intermittent power reduction
- Corrosion: Oxidized connections increase resistance, creating heat and power loss
- Water intrusion: Moisture in connectors creates leakage paths, short circuits
- Mechanical stress: Inadequately supported cable creates connector strain leading to failure
Last month I diagnosed a station complaining of "transmitter problems"—coverage had declined 40% over two years. Transmitter tested perfectly. The problem: coax connector at antenna had corroded, creating 4 dB additional loss (60% power loss). Replacing the connector restored full coverage. Cost: $15 and 30 minutes.
The Fix
Select appropriate cable for application:
For transmitter powers and cable runs:
- 15-50W, runs <15m: RG-8 acceptable (budget option)
- 50-300W, any length or 15-50W, runs >15m: LMR-400 minimum recommendation
- 300W+, runs >20m: 1/2" or 7/8" hardline
Calculate total system loss and ensure radiated power meets needs. For 100W transmitter with 30m run:
- RG-8: Radiates 62W (-38% loss)
- LMR-400: Radiates 76W (-24% loss)
- 1/2" hardline: Radiates 87W (-13% loss)
Install connections properly:
- Use quality connectors: N-type connectors for professional installations ($8-15 each)
- Follow manufacturer instructions: Proper crimp or solder techniques
- Weatherproof outdoor connections: Use self-amalgamating tape + quality electrical tape or heat-shrink boots
- Support cable weight: Strain relief prevents connector damage
- Protect from moisture: Seal all outdoor connections; inspect annually
Implement maintenance schedule:
Monthly checks:
- Visual inspection of outdoor connections
- Verify power readings unchanged from baseline
- Check transmitter temperature normal
Quarterly checks:
- Measure SWR and compare to baseline
- Inspect cable for damage, kinking, UV degradation
- Check and tighten all connections
Annual maintenance:
- Remove and inspect weatherproofing on outdoor connections
- Re-weatherproof if degradation visible
- Professional SWR and power measurements
- Comprehensive system evaluation
Document baseline measurements: When initially installing, record:
- Forward and reflected power
- SWR across frequency range
- Coverage field strength measurements at test points
Compare these measurements during maintenance. Changes indicate developing problems before they cause failures.
Real Example: I visited a religious broadcaster experiencing gradual coverage decline. Their original coverage was 18 km; three years later it had declined to 12 km. Troubleshooting revealed:
- Coax connectors at building entry had corroded (moisture intrusion): 2.5 dB loss
- 25m RG-8 cable had UV degradation: additional 1.2 dB loss beyond specification
- Antenna mounting had shifted creating slight SWR increase: 0.8 dB loss
Total system degradation: 4.5 dB = 65% power loss. We replaced cable (upgraded to LMR-400), installed fresh connectors with proper weatherproofing, and realigned antenna. Coverage restored to 19 km—actually better than original due to cable upgrade. Cost: $320 in materials plus 4 hours labor.
Common Misconception
"Cable is cable—buy the cheapest option." This costs far more long-term. Quality cable outlasts cheap cable by 10+ years and loses less power throughout its life. For a 100W installation, spending $150 extra on LMR-400 instead of RG-8 delivers 40% more radiated power—equivalent to upgrading from 100W to 160W transmitter (which would cost $200-300 more). The cable upgrade is the better investment.
Coverage Optimization Checklist
Use this checklist to audit your FM transmitter installation and maximize coverage:
Power and Settings:
- Transmitter operating at rated power (not over or significantly under)
- Forward power stable and matching specifications
- Reflected power <5% of forward power
- No overheating or protection circuit activation
Antenna Height and Positioning:
- Antenna at maximum practical height (minimum 15m for community stations)
- Clear line of sight in target coverage directions
- No large obstacles within 15m of antenna
- Rooftop or tower installation (not ground-level)
Antenna Selection and Matching:
- Professional FM broadcast antenna (not improvised)
- Appropriate gain for coverage requirements
- SWR <1.5:1 across operating frequency ±200 kHz
- Circular or vertical polarization for mobile reception
- Proper grounding with <10Ω ground resistance
Frequency Selection:
- Professional spectrum survey completed before frequency selection
- No co-channel stations within minimum spacing distance
- No strong adjacent channel stations causing interference
- Test broadcasts confirmed clean frequency throughout coverage area
- Coordination with nearby broadcasters completed
Feedline and Connections:
- Quality coaxial cable appropriate for power level
- Cable length minimized to reduce loss
- All connections properly installed and weatherproofed
- No visible cable damage, kinking, or degradation
- Annual maintenance schedule implemented
Measured Performance:
- Baseline measurements documented at installation
- Regular comparison measurements detect changes early
- Field strength measurements confirm expected coverage
- Listener feedback indicates good signal quality
%(Optimization checklist)FM transmitter coverage optimization checklist
Conclusion
Coverage problems usually stem from these five mistakes. Most cost nothing to fix—they require knowledge and attention rather than expensive equipment. I’ve seen dozens of stations double their coverage by correcting these errors without spending more than $500.
Start with the checklist above. Address any items you haven’t verified. Measure your baseline performance now so you can detect future degradation before it impacts your audience.
If you find problems beyond your technical capability, consult an experienced RF engineer. A few hours of professional assistance costs far less than operating with reduced coverage indefinitely—or worse, damaging equipment through continued operation with undetected problems.
Your listeners deserve reliable coverage. These five corrections will deliver it.