10 Questions to Ask Before Buying an FM Transmitter
Make the Right Choice for Your Broadcasting Needs
I’m an RF engineer at RS, and I help customers select FM transmitters for their specific applications. Maybe the most common mistake I see is buyers focusing only on transmitter power without considering the complete system and their actual requirements. You end up with equipment that doesn’t match your needs—too powerful and expensive, or not powerful enough to cover your area.
The right transmitter depends on many factors beyond just wattage. Your coverage area, terrain, antenna placement, audio quality needs, and operating environment all affect which transmitter works best. These 10 questions help you evaluate your requirements and choose equipment that actually solves your problem.
Question 1: What Coverage Area Do I Actually Need?
Why This Question Matters First
Coverage area determines everything else about your transmitter selection. Maybe you’re installing a campus radio and think "we need to cover the whole campus," but you haven’t measured the actual distance. Or you’re setting up drive-in cinema audio and assume one power level works for all parking lots. Or you want religious broadcast coverage but haven’t considered whether you need to reach 2 km or 10 km.
I talk to customers who buy 300W transmitters for 3 km coverage when 50W would work fine. Or customers who buy 50W expecting 10 km coverage and are disappointed. Both situations waste money or create frustration.
Understanding Coverage Requirements
Start by measuring your actual coverage needs. For campus radio, walk the campus boundaries and note the farthest points. For religious broadcasting, identify the neighborhoods you want to reach. For drive-in cinema, measure the parking lot dimensions. For industrial facilities, map the areas where workers need to receive broadcasts.
Coverage isn’t just about distance. It’s about the specific area shape and what’s between your transmitter location and coverage boundary. A circular 5 km radius is different from a narrow 10 km corridor along a highway.
Rough Coverage Guidelines
These are approximate coverage ranges with 30m antenna height on relatively flat terrain:
15W reaches 1-3 km radius—suitable for small campus, parking lot, or drive-in cinema
50W reaches 3-5 km—works for medium campus, neighborhood church, or small community
100W reaches 7-12 km—covers town area, large campus, or multiple neighborhoods
300W reaches 15-20 km—regional coverage for community stations
500W and above—wider regional coverage for established stations
Your actual coverage depends heavily on antenna height and terrain. Higher antenna placement improves coverage more than higher power. A 50W transmitter with antenna at 40m often covers more area than 100W with antenna at 15m.
Key Considerations
Urban environments need more power than rural areas because buildings block signals. Hilly terrain requires more power than flat areas. Dense vegetation absorbs signal strength.
Don’t just calculate distance from transmitter to coverage edge. Consider obstacles in between. If you’re in a valley surrounded by hills, you might need 3-4 times more power than flat terrain calculations suggest.
For drive-in cinema, coverage is relatively easy because the area is compact and you can position the antenna centrally. A 7-15W transmitter typically covers a medium parking lot. For campus or community radio, coverage is more challenging because you need to reach dispersed locations with obstacles.
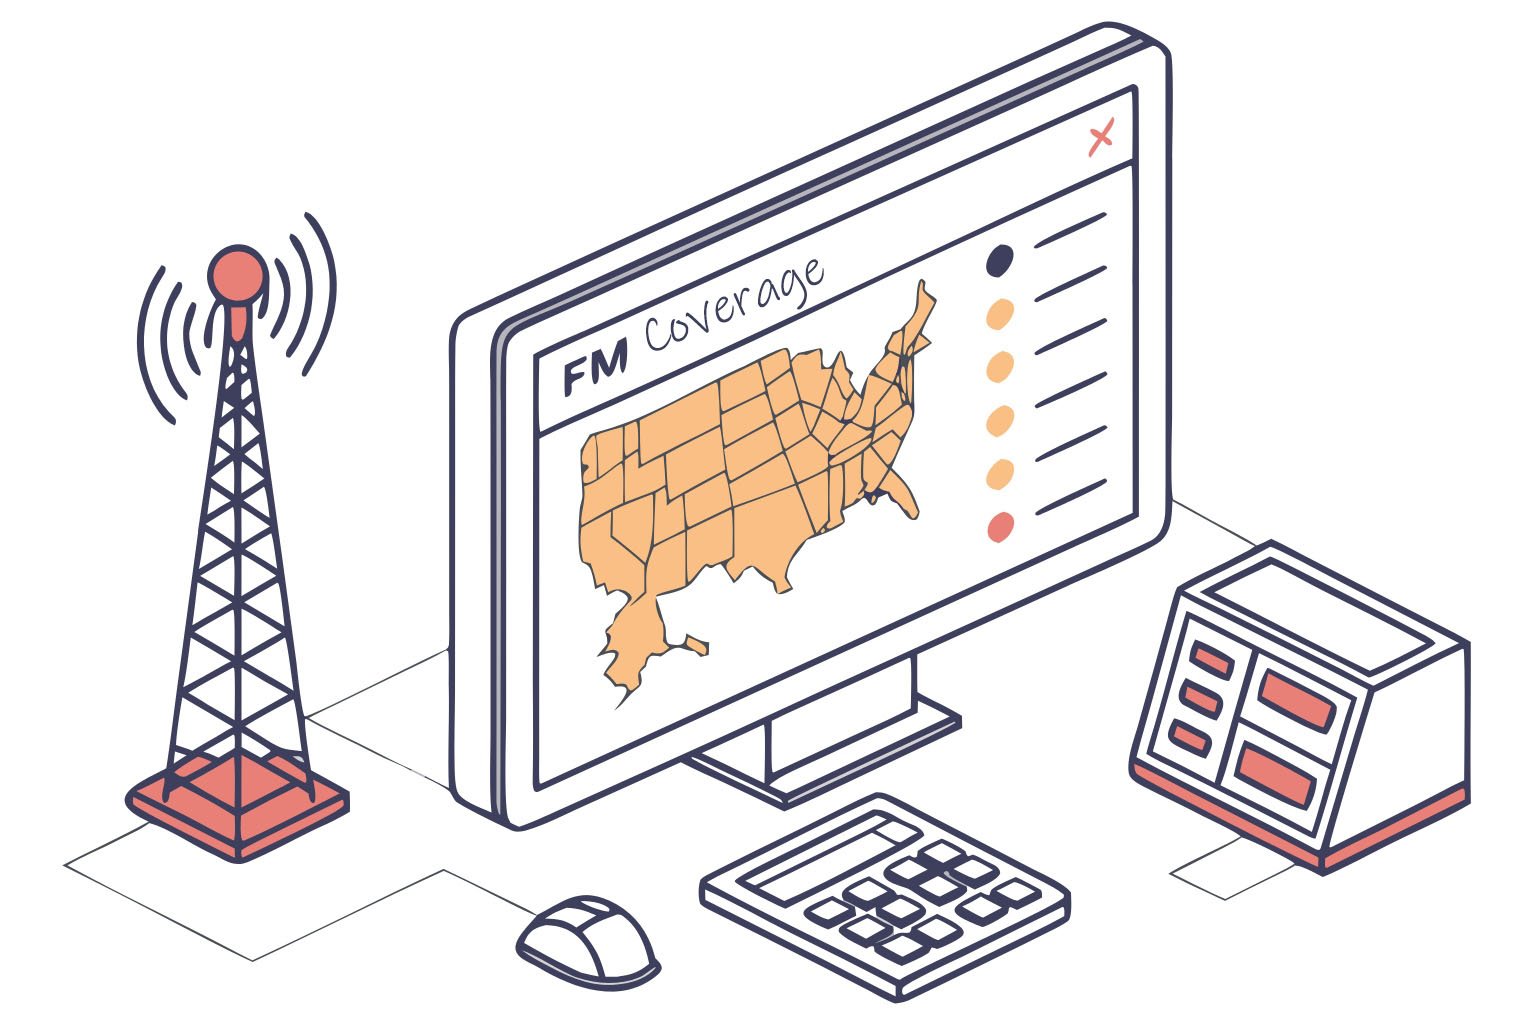
Planning Your Coverage
Visit your proposed transmitter location. Look around and identify what you can see. If you can’t see your coverage area from the transmitter location, the signal will be blocked. Consider using mapping software that accounts for terrain elevation to predict coverage.
Test if possible before committing. Some installers bring a low-power transmitter to the site and drive around checking signal reception. This reveals unexpected obstacles or problem areas.
Question 2: What Power Level and Coverage Range Matches My Application?
Matching Power to Application Type
Different applications need different power levels. Maybe you’re setting up a small church broadcast and wondering if 15W is enough. Or planning campus radio and trying to decide between 50W and 100W. Or establishing community station and questioning whether 300W covers your town.
The application type gives guidance on appropriate power range:
Drive-in Cinema and Parking Lot Audio: 7-30W typically sufficient. Coverage area is compact and you control antenna placement centrally. The parking lot size determines power needs—small lot uses 7-15W, large lot needs 30W.
Campus Radio: 15-100W depending on campus size. Small college campus works with 15-30W. Medium university needs 50W. Large campus with dispersed buildings requires 100W.
Religious Broadcasting (Church, Mosque, Temple): 30-300W based on congregation distribution. Local neighborhood coverage uses 30-50W. Multiple neighborhoods need 100-150W. Town-wide coverage requires 300W.
Community Radio Stations: 100-500W for local community coverage. Small town uses 100-150W. Larger town needs 300W. Regional coverage requires 500W or more.
Industrial and Commercial Facilities: 15-100W based on facility size. Factory floor coverage works with 15-30W. Large industrial park needs 100W. Mining operations often need 300W for extensive area coverage.
Event and Festival Broadcasting: 15-50W for temporary events. Small venue uses 15W. Large festival grounds need 50W.
Power vs. Budget Balance
Higher power costs more for the transmitter itself, but also increases other system costs. You need heavier-duty antenna, lower-loss cable, better power supply, and more cooling. Licensing fees often scale with power level too.
Sometimes it’s more economical to improve antenna height than buy higher power. If you’re deciding between 100W with basic antenna and 50W with excellent antenna placement, the 50W solution often performs better and costs less.
Thinking About Growth
Consider your future needs. Maybe you’re starting with neighborhood coverage but plan to expand. Buying appropriate power initially saves upgrading costs later. However, don’t overbuy for distant possibilities—buy what you need now plus modest margin for growth.
Some customers ask about starting with low power to "test the market" then upgrading. This works for temporary events but creates expense for permanent stations. You’ll need to reapply for frequency coordination, potentially change antenna systems, and reinstall components. Plan properly from the start.
Power Isn’t Everything
Remember that transmitter power is just one factor. Antenna height, antenna gain, cable quality, and site location all affect your effective coverage. I’ve seen 30W installations with excellent coverage because everything else was done correctly, and 300W installations with poor coverage because antenna placement was inadequate.
Focus on the system, not just the transmitter wattage.
Question 3: Does It Support Full Frequency Range and Easy Tuning?
Why Frequency Flexibility Matters
Maybe you’re buying a transmitter and assume it automatically works on any FM frequency. Or you think frequency doesn’t matter because you’ll just "find an empty channel." The reality is more complex. Your assigned frequency might not be what you initially expected. Interference might force frequency changes. Equipment that locks you into limited frequency range creates problems.
I’ve supported customers who bought transmitters that only covered 88-98 MHz, then received frequency assignment at 106 MHz. The transmitter was useless for their licensed frequency. Or customers who could only tune in 100 kHz steps when they needed 50 kHz adjustment to avoid interference.
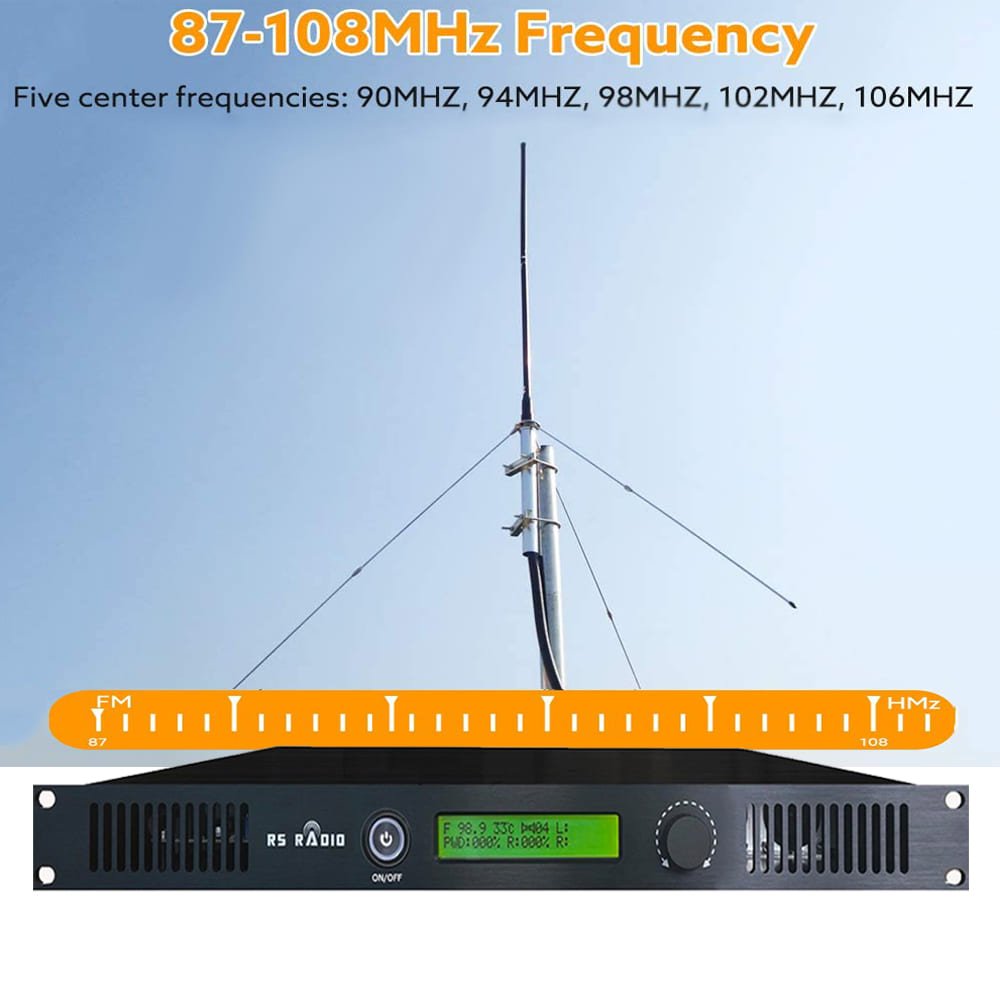
Full Band Coverage
Professional FM transmitters should cover the complete broadcast FM band for your region. In most countries, that’s 87.5-108 MHz. Some transmitters only cover portions of the band or have gaps in coverage.
Verify the transmitter you’re considering covers the entire band without limitations. This ensures you can operate on whatever frequency you’re assigned by the telecommunications authority.
Frequency Adjustment Methods
Transmitters use different methods for frequency adjustment:
Digital PLL Synthesis: Most modern professional transmitters use this. You can set any frequency within the range with precision. Adjustment is typically through front panel buttons or computer interface. This is the best approach because it’s accurate and flexible.
Manual Crystal Oscillator: Older or budget transmitters use individual crystals for each frequency. Changing frequency requires physically installing a different crystal. This limits flexibility and makes frequency changes difficult.
DIP Switch or Jumper Selection: Some transmitters use switches to select frequency. This works but isn’t as convenient as digital synthesis.
For any permanent installation, choose a transmitter with digital frequency synthesis. The flexibility is worth it even if it costs slightly more.
Frequency Step Size
Check what frequency steps the transmitter supports. Can it tune in 50 kHz steps, 100 kHz steps, or even finer? Finer steps give more flexibility to avoid interference from adjacent channels.
Most regulatory authorities assign frequencies in 100 kHz or 200 kHz steps depending on region. Having 50 kHz or finer tuning capability lets you optimize your frequency if interference appears.
Frequency Stability
The transmitter should maintain accurate frequency over time and temperature changes. Professional transmitters specify frequency accuracy, typically ±1000 Hz or better. This ensures you stay on your assigned frequency and don’t drift into adjacent channels.
Temperature-compensated crystal oscillators or oven-controlled oscillators provide better stability than basic crystals. For commercial broadcasting, frequency stability matters for regulatory compliance.
Frequency Coordination Considerations
Before purchasing any transmitter, coordinate your frequency with the appropriate telecommunications authority. Find out what frequency you’re assigned or likely to receive. Verify the transmitter you’re buying can operate on that frequency.
Don’t assume you can use whatever frequency you want. Even low-power transmitters typically require frequency authorization. The assigned frequency might not match your preference, so equipment flexibility is important.
Question 4: What Audio Quality Specifications Should I Look For?
Audio Quality Fundamentals
Maybe you’re comparing transmitters and see specifications like "SNR >65dB" or "THD <0.5%" and wonder what these mean. Or you assume all transmitters sound the same as long as they’re broadcasting. Audio quality varies significantly between transmitters, and poor audio quality damages your broadcast’s professionalism.
For religious broadcasting, listeners need to hear clear speech. For campus radio with music programming, audio quality directly affects listener experience. For drive-in cinema, poor audio ruins the movie experience. Audio specifications tell you what to expect.
Signal-to-Noise Ratio (SNR)
SNR measures how much louder your audio is compared to background noise. Higher numbers mean cleaner audio with less hiss and background noise.
Professional FM transmitters should have SNR of 65 dB or better. Economy transmitters might only achieve 55-60 dB. The difference is noticeable—lower SNR means audible hiss during quiet passages.
For speech-based applications like religious broadcasting or information stations, 60 dB SNR is acceptable. For music programming like campus radio or community stations, aim for 65 dB or higher. Drive-in cinema audio should be 65 dB minimum for good movie experience.
Total Harmonic Distortion (THD)
THD measures audio distortion—how much the transmitter alters your audio signal. Lower THD means more accurate reproduction of your source material.
Good FM transmitters have THD below 0.5%. Better transmitters achieve 0.3% or lower. Poor quality transmitters might have 1-2% THD, which creates audible distortion on music and harsh sound on speech.
For music broadcasting, keep THD below 0.5%. For speech-only applications, 0.8% is acceptable though lower is always better.
Frequency Response
Frequency response shows which audio frequencies the transmitter reproduces accurately. Professional transmitters should be flat (accurate) from 50 Hz to 15 kHz, which covers the full audio spectrum for FM broadcasting.
Some budget transmitters roll off bass below 100 Hz or treble above 10 kHz. This makes broadcasts sound thin or dull. Music broadcasting especially needs full frequency response.
Check the specifications for frequency response. Look for something like "50 Hz – 15 kHz ±1 dB" which indicates accurate reproduction across the audio spectrum.
Stereo Performance
If you’re broadcasting music, stereo capability enhances listener experience. Stereo transmitters should provide good channel separation—typically 40 dB or better at 1 kHz. This ensures distinct left and right channels for proper stereo imaging.
Verify the transmitter includes stereo encoder if you need stereo capability. Not all transmitters include this—some are mono only or require separate stereo encoder.
For speech-based broadcasting like religious services or information stations, mono is often sufficient and actually provides slightly better coverage because mono signals are more robust than stereo.
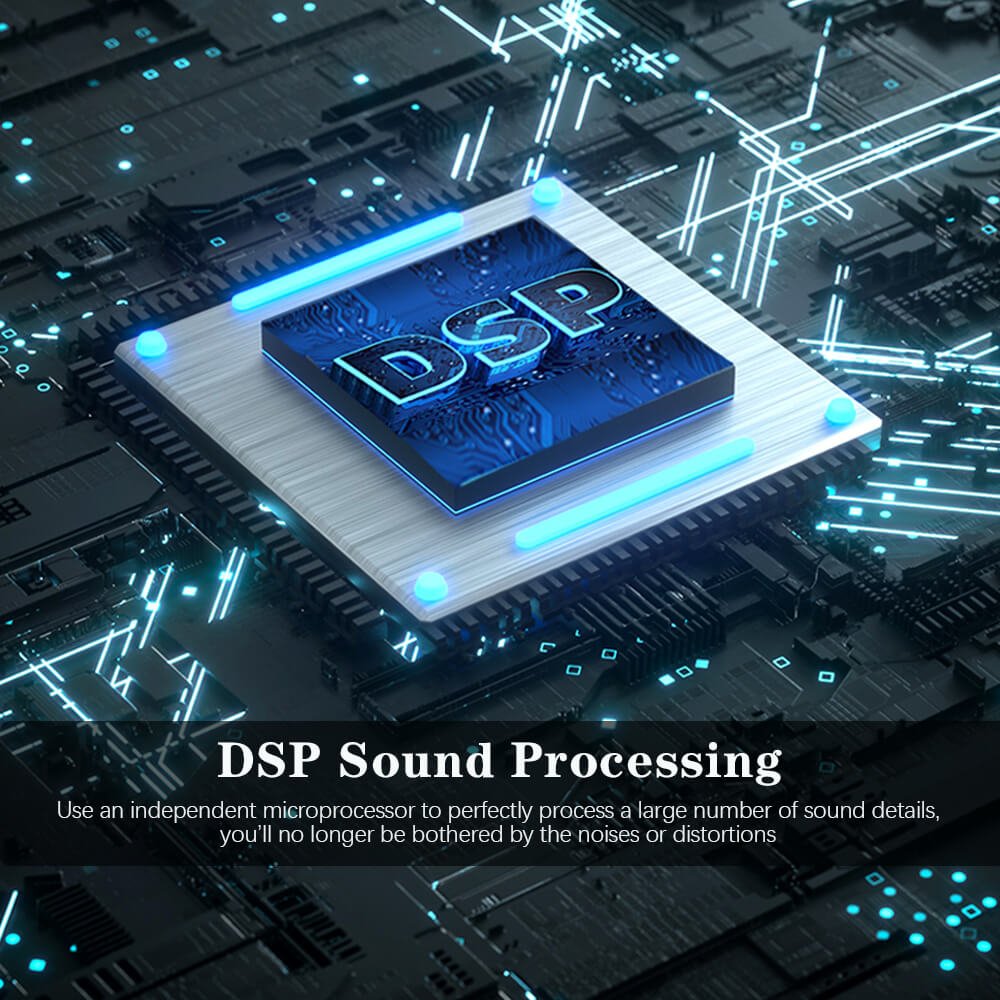
Audio Processing
Some transmitters include built-in audio processing—compression, limiting, and EQ. This helps maintain consistent volume levels and optimize audio for broadcast. For simple applications this built-in processing works well.
Professional stations often use external audio processors for more control and better quality. These separate processors cost more but provide superior results for critical music broadcasting.
Consider whether built-in processing meets your needs or if you’ll use external processing equipment.
Testing Audio Quality
If possible, listen to a transmitter before buying. Bring quality source material—music with wide dynamic range and clear speech. Compare how different transmitters reproduce the audio. Trust your ears—if it sounds good, it probably is good.
Audio specifications provide objective comparison, but listening reveals the actual character of the broadcast audio.
Question 5: What Protection Features Ensure Reliable Operation?
Why Protection Matters
Maybe you’re planning to operate your transmitter continuously for religious broadcasting or community radio. Or you need reliable operation for drive-in cinema every weekend. Transmitters without adequate protection fail prematurely from overheating, high SWR, or power fluctuations. These failures create downtime and repair costs.
Protection features prevent damage from common operating conditions. They extend equipment life and reduce maintenance costs. For professional applications, protection isn’t optional—it’s essential.
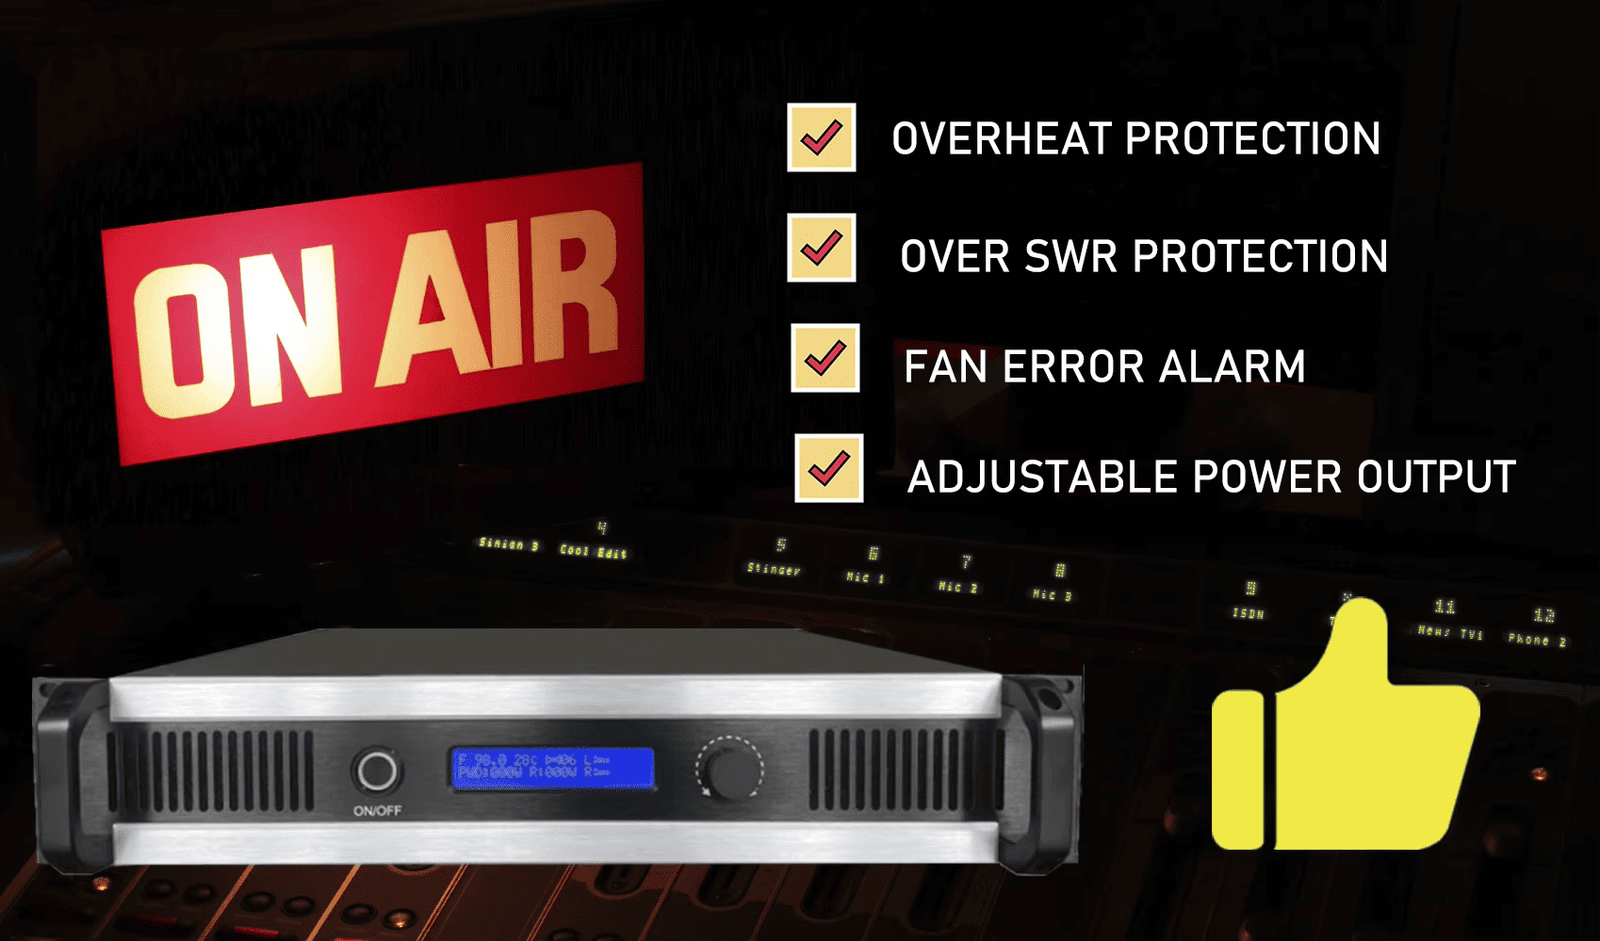
Over-Temperature Protection
Transmitters generate heat during operation. Amplifier stages especially get hot at high power levels. Without temperature monitoring, components overheat and fail.
Good transmitters include temperature sensors that monitor critical components. When temperature exceeds safe limits, the transmitter either reduces power automatically or shuts down to prevent damage.
At RS, our transmitters use temperature protection that activates around 60°C. This prevents thermal damage while allowing safe operation in normal environments. The transmitter automatically resumes normal operation when temperature drops.
Verify that any transmitter you consider includes over-temperature protection with automatic shutdown or power reduction. This is fundamental for reliability.
High VSWR Protection
VSWR (Voltage Standing Wave Ratio) indicates how well your antenna system matches the transmitter. High VSWR means reflected power returns to the transmitter instead of radiating from the antenna. This reflected power damages the output amplifier.
Professional transmitters monitor VSWR continuously. When VSWR exceeds safe limits (typically around 2:1 or 2.5:1), the transmitter reduces power or shuts down to prevent amplifier damage.
This protection is critical because antenna systems degrade over time. Connectors corrode, cables develop water damage, and antennas get damaged by weather. When these problems increase VSWR, protection prevents expensive transmitter damage.
Power Supply Protection
Electrical power varies in quality and stability. Voltage spikes, sags, and noise can damage transmitter components. Good transmitters include power supply protection against these conditions.
Look for transmitters with over-voltage and under-voltage protection. These features shut down the transmitter if supply voltage goes outside safe range, preventing damage to sensitive circuits.
Built-in surge protection helps defend against brief voltage spikes from switching or nearby lightning. While not a substitute for external surge protection, it adds another layer of defense.
Output Power Limiting
Some transmitters include automatic power limiting that prevents accidental over-driving. If you accidentally increase modulation too much, the limiter prevents excessive output that could damage components or create interference.
This is especially useful for applications where multiple operators might adjust the transmitter, like campus radio or community stations. The protection prevents mistakes from causing damage.
Fan and Cooling System
Adequate cooling extends transmitter life significantly. Forced-air cooling with fans is standard for transmitters above 15-30W. Verify the transmitter includes proper cooling for its power level.
Check whether fans are temperature-controlled or run continuously. Temperature-controlled fans are quieter during light use but provide full cooling when needed.
For high-power transmitters, consider whether the cooling system is serviceable—can you clean or replace fans without major disassembly?
Protection vs. Reliability
Protection features don’t reduce reliability—they enhance it. A transmitter that shuts down when overheating is more reliable than one that runs until components fail. The protection prevents damage and allows operation to resume when conditions improve.
For continuous operation applications like community radio or religious broadcasting, protection features are essential for long-term reliability.
Question 6: How Easy Is It to Operate and Maintain?

Operation Complexity Matters
Maybe you’re setting up campus radio where student volunteers will operate the transmitter. Or installing church broadcast where staff without technical background will handle daily operation. Or planning drive-in cinema where weekend operators need to start the system quickly. Complex operation creates problems and mistakes.
I’ve seen transmitters with confusing menus where operators couldn’t find basic settings. Or transmitters with cryptic error codes that required engineering manuals to interpret. Or systems where simple tasks like frequency adjustment required complicated procedures. This complexity causes operational errors and training difficulties.
Front Panel Design
The front panel should clearly display essential information: operating frequency, output power, temperature, and SWR. You should see at a glance whether the transmitter is operating normally.
LCD or LED displays work well if they’re large enough to read easily. Some transmitters use tiny displays with small text that’s difficult to read from normal distance. This creates operator frustration.
Controls should be logical and clearly labeled. If you need to adjust frequency, the frequency control should be obvious. If you adjust modulation level, that control should be accessible and clearly marked.
Menu Systems
Digital transmitters use menu systems for configuration. These should be intuitive—organized logically so you can find settings without hunting through multiple screens.
Simple menu structures work better than complex hierarchies. Maybe two or three menu levels maximum. Each setting should have a clear description of what it does.
Some transmitters include quick-access shortcuts for commonly adjusted parameters. This speeds up routine adjustments.
Error Reporting
When problems occur, the transmitter should indicate what’s wrong in plain language. "High SWR" or "Over Temperature" messages tell you what to check. Cryptic codes like "Error 07" require manual lookup and slow troubleshooting.
Good transmitters distinguish between faults that require shutdown and warnings that indicate minor issues. This helps you prioritize responses.
Remote Monitoring and Control
For unattended installations or remote sites, remote monitoring capability is valuable. This might be simple relay contacts that indicate transmitter status, or sophisticated computer interface that allows complete control.
Campus radio or community stations benefit from remote monitoring—you can check transmitter status from the studio without visiting the transmitter location. For drive-in cinema or events, this might be less important.
Consider what level of remote capability you need and whether the transmitter provides it.
Maintenance Accessibility
Routine maintenance should be straightforward. Can you clean air filters easily? Are fans accessible for replacement? Can you check connections without major disassembly?
Some transmitters require extensive disassembly just to access basic components. This increases maintenance time and cost. Better designs provide easy access to components that need regular service.
Documentation Quality
Good documentation makes operation and troubleshooting easier. The manual should include clear setup instructions, operation procedures, and troubleshooting guides.
Wiring diagrams, block diagrams, and component locations help with repairs. Specifications sheets provide technical details for system planning.
At RS, we provide comprehensive manuals with our transmitters plus ongoing WhatsApp support for customers who need assistance. This combination of documentation and personal support helps customers succeed.
Training Requirements
Consider who will operate the transmitter and what training they’ll need. If the transmitter is complex, you’ll need to invest time training operators and creating procedures.
Simpler transmitters reduce training time and minimize operational errors. This is especially valuable when multiple people operate the equipment.
Question 7: Does the Antenna System Match My Installation Requirements?
Antenna System Importance
Maybe you’re focused on buying the transmitter and treating the antenna as an afterthought. Or you assume any antenna works as long as it’s "for FM broadcasting." The antenna system matters as much as the transmitter—poor antenna installation wastes half your transmitter power and creates coverage problems.
Antenna type, gain, and installation height all affect your effective coverage. The right antenna system properly matched to your application makes the difference between success and disappointment.
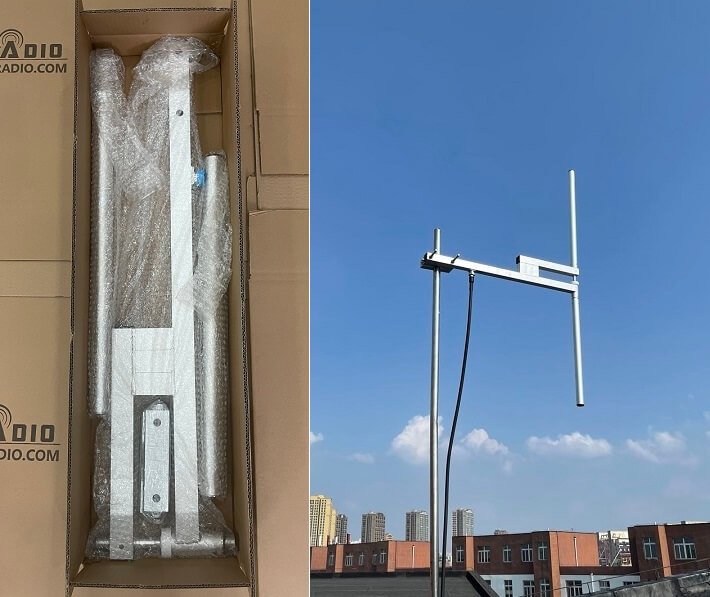
Antenna Types
Different antenna designs suit different applications:
Dipole Antennas: Simple design with moderate gain (around 0-2 dBd). Omnidirectional coverage pattern radiates equally in all directions horizontally. Works well for applications needing circular coverage like campus radio or drive-in cinema. Lower cost and easy installation.
Circular Polarized Antennas: Radiates in both horizontal and vertical polarization. Improves mobile reception—works with both horizontal and vertical receiver antennas. Useful for drive-in cinema and parking lot applications where car antennas have various orientations.
Yagi or Directional Antennas: Focuses power in one direction for increased coverage in that direction. Useful when you need coverage along a specific path like a highway or valley. Not appropriate for omnidirectional applications.
High-Gain Antennas: Multiple elements increase gain and compress vertical radiation pattern. Extends horizontal coverage but reduces coverage for nearby locations. Appropriate for flat terrain where distant coverage matters more than close-in coverage.
For most community and campus radio applications, a dipole or low-gain omnidirectional antenna works best. For drive-in cinema, circular polarized antenna improves reception for all vehicles.
Antenna Gain Considerations
Antenna gain amplifies your effective radiated power in preferred directions. A 2 dBd gain antenna makes your 50W transmitter effectively 80W in the horizontal plane.
However, gain comes with tradeoffs. Higher gain compresses the vertical radiation pattern, which can create coverage gaps for nearby receivers or those at different elevations. For small coverage areas, moderate gain (0-3 dBd) works better than high gain.
Consider your terrain and coverage needs when selecting antenna gain. Flat terrain benefits more from higher gain. Hilly terrain often works better with moderate gain that provides better vertical coverage.
Antenna Height Requirements
Antenna height affects coverage more than any other single factor. Doubling antenna height often improves coverage more than quadrupling transmitter power.
For campus radio, try to mount antenna on the tallest building roof, preferably with a mast to elevate it further. For religious broadcasting, the church tower or steeple might provide excellent height. For community stations, consider tower construction if budget allows.
Minimum practical heights:
- Drive-in cinema: 10-15m adequate for parking lot coverage
- Campus radio: 20-30m minimum, more is better
- Community radio: 30-50m for town coverage
- Regional broadcasting: 50m+ required
Local terrain affects these guidelines. Hilltop locations need less height than valley locations for equivalent coverage.
Cable and Connector Matching
The coaxial cable connecting transmitter to antenna should match both components. Standard FM broadcast systems use 50Ω impedance. Verify antenna, cable, and transmitter all use 50Ω.
Cable quality matters—loss in the cable reduces your effective power. For longer cable runs, invest in higher quality low-loss cable. The cable cost is small compared to the performance benefit.
All connectors should be weather sealed for outdoor installations. Water intrusion in connectors causes loss and corrosion that degrades performance over time.
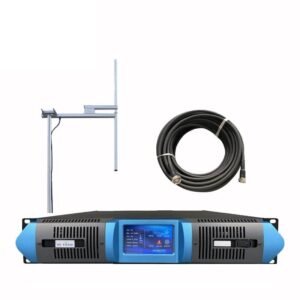
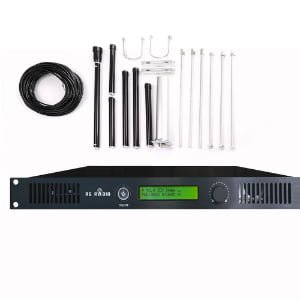
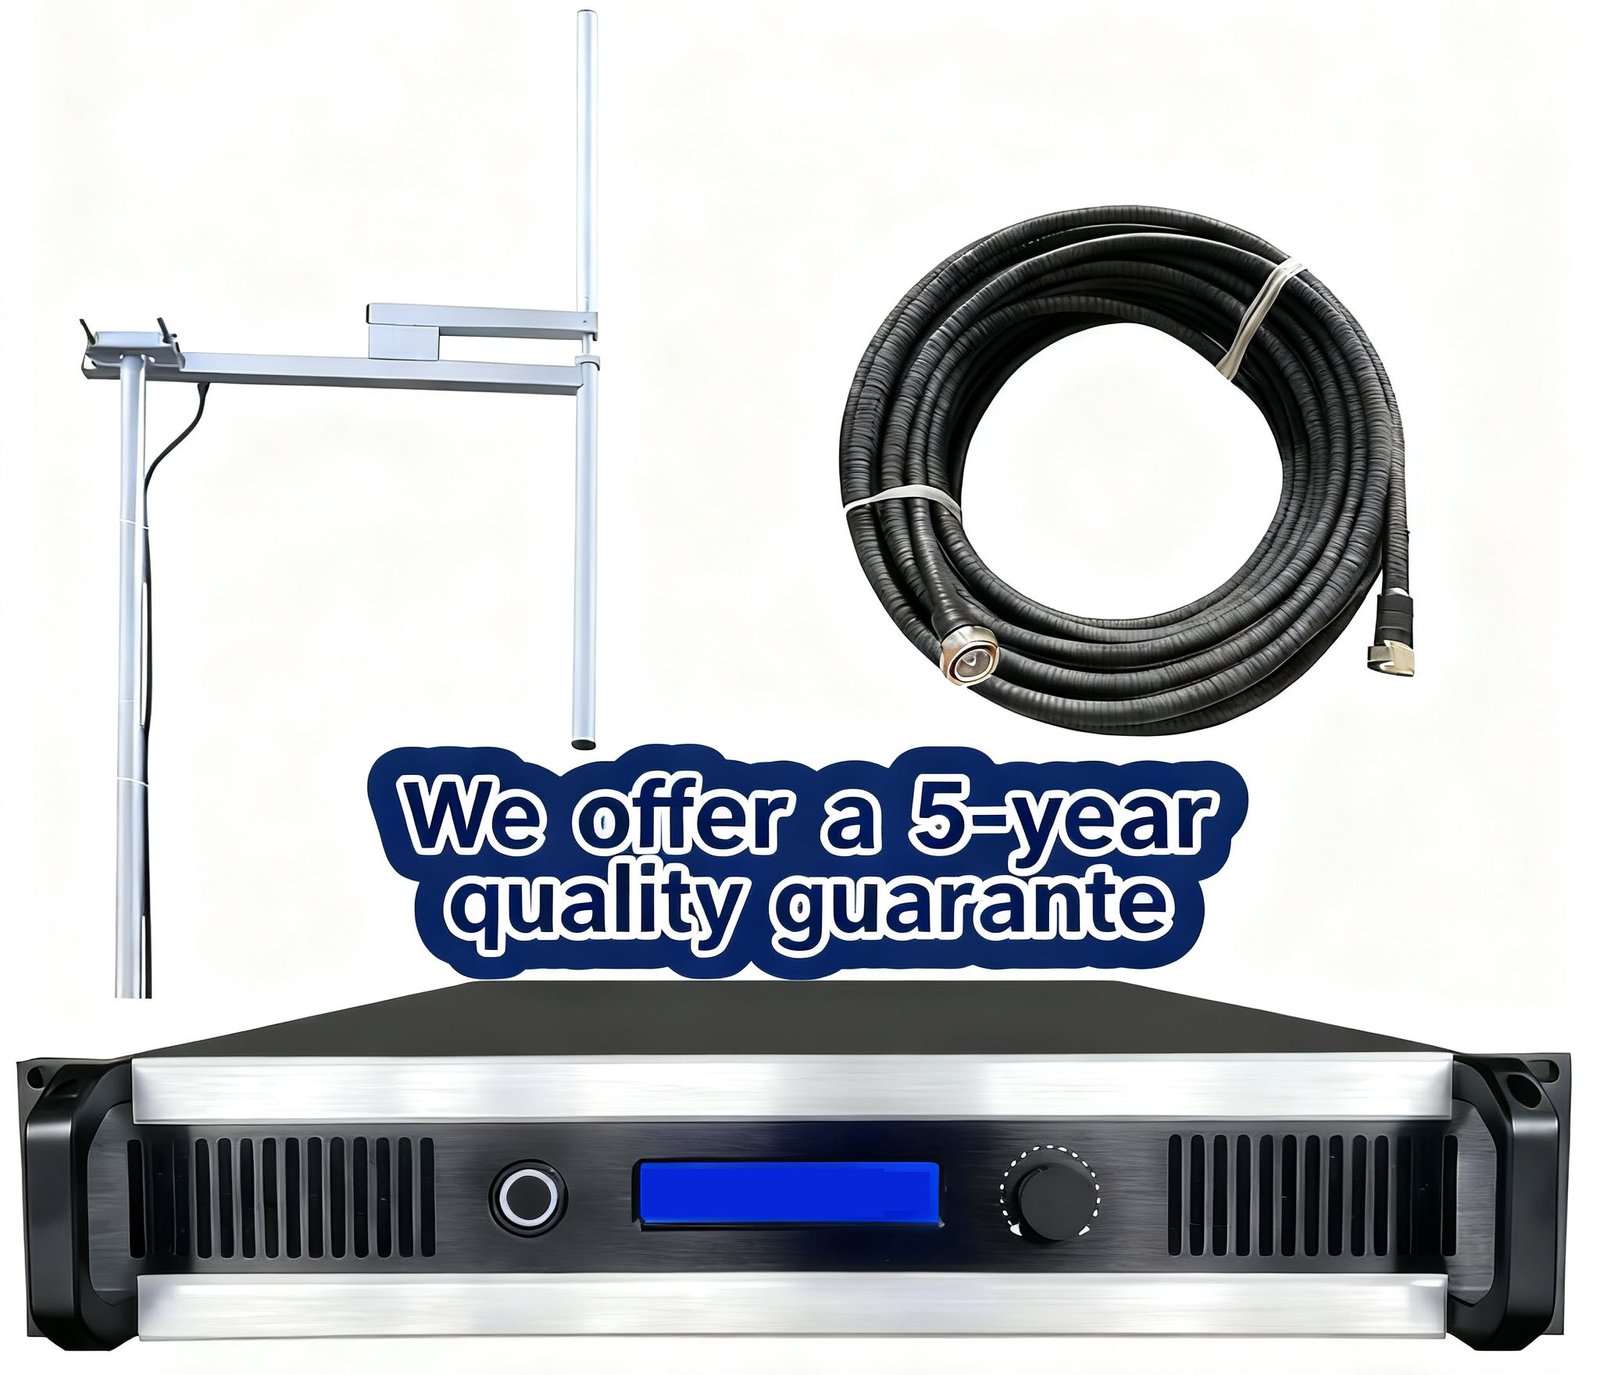
Complete System Solutions
Some manufacturers offer complete system packages including transmitter, antenna, and cable matched for specific applications. This simplifies purchasing and ensures components work together properly.
At RS, we provide complete solutions matched to customer applications. The antenna, cable, and transmitter are specified together based on coverage requirements and installation conditions. This system approach prevents mismatches and ensures optimal performance.
Installation Considerations
Plan antenna installation before purchasing. Do you have a suitable location for the antenna? Can you achieve adequate height? Who will install it—do you need professional tower climbers?
In some locations, antenna installation is more challenging than transmitter installation. Rooftop access, tower construction, or building owner permissions might be required. Address these issues during planning rather than after buying equipment.
Question 8: What Are the Licensing and Certification Requirements?
Regulatory Compliance Importance
Maybe you assume buying a transmitter means you can start broadcasting immediately. Or you think low power transmitters don’t require licensing. Or you’re installing in a region where enforcement seems relaxed. Operating without proper authorization creates legal risks, potential fines, and equipment confiscation.
Even if immediate enforcement seems unlikely, proper licensing protects you legally and prevents interference problems with other broadcasters. For churches, schools, and community organizations, operating legally is especially important for reputation and credibility.
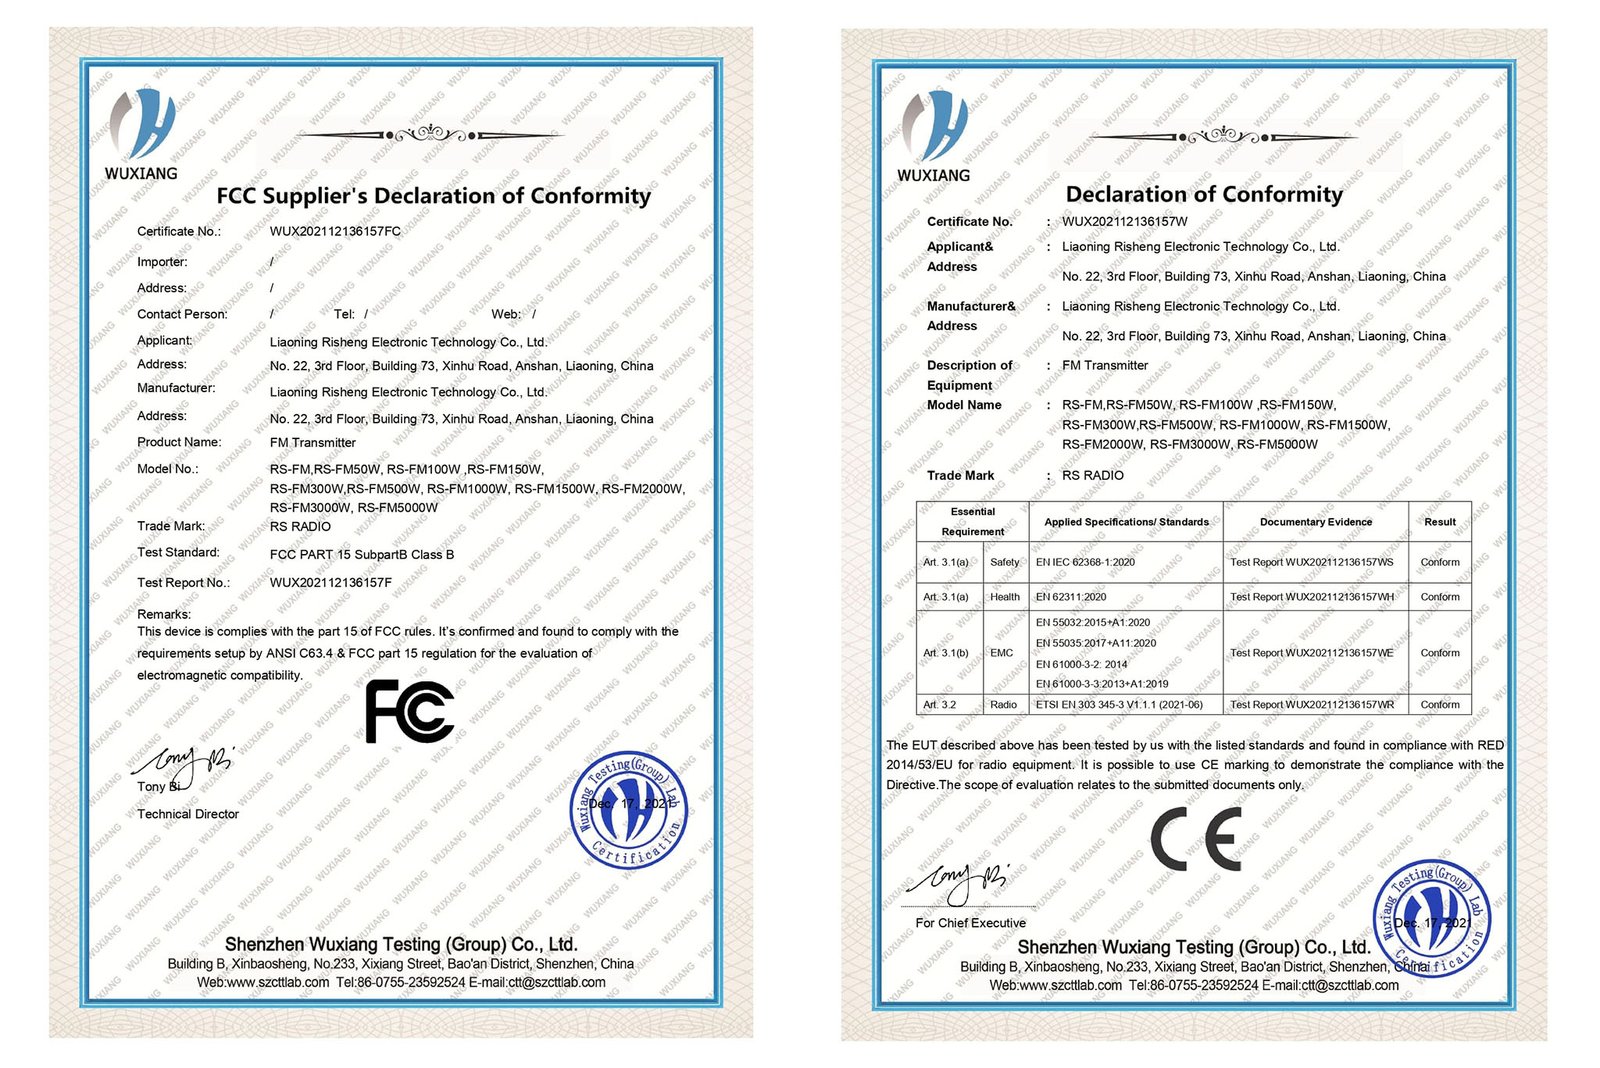
Transmitter Certification
Many countries require transmitters meet specific technical standards before they can be sold or operated. The certification proves the transmitter meets emission limits, frequency stability requirements, and other technical regulations.
FCC Certification (USA): Required for transmitters operated in the United States. The FCC Part 15 or Part 73 certification indicates compliance with US regulations. Operating non-certified equipment risks fines and confiscation.
CE Marking (Europe): Required for transmitters sold in European Union. CE marking indicates compliance with EU directives for electromagnetic compatibility and safety.
Other countries have similar certification systems. Verify that transmitters you consider have appropriate certification for your location. At RS, our transmitters include FCC and CE certificates for operation in most markets.
Operating License Requirements
Beyond equipment certification, you typically need an operating license from the telecommunications authority. This license assigns your frequency and authorizes your station operation.
Requirements vary significantly by country and power level. Some countries exempt very low power (under 1W) from licensing. Most require licensing for any power level that provides meaningful coverage.
The licensing process typically requires:
- Application with station details and technical specifications
- Frequency coordination to avoid interference with existing stations
- Engineering studies showing coverage area and interference potential
- Fees (varies widely by country and power level)
- Public comment period in some jurisdictions
Start the licensing process early—it often takes months. In regulated markets like the USA, frequency coordination and licensing can take 6-12 months for LPFM (Low Power FM) stations.
Frequency Coordination
Frequency coordination ensures your transmitter doesn’t interfere with existing stations and isn’t subject to interference from them. The telecommunications authority or professional frequency coordinators perform this analysis.
Don’t select frequency by scanning the FM band and using an "empty" channel. That channel might be allocated to another station, used at different times, or reserved for future use. Proper coordination protects you and other broadcasters.
For US LPFM stations, professional frequency coordinators charge fees to handle the coordination and application process. This investment prevents costly mistakes in frequency selection.
Power Level Restrictions
Many countries limit transmitter power based on station type and location. Educational institutions might have different limits than commercial broadcasters. Community stations might face restrictions that don’t apply to major broadcasters.
Research power limits before selecting transmitter power. Buying a 500W transmitter might seem prudent for future growth, but if local regulations limit you to 100W, the extra power is wasted investment.
International Considerations
If you’re importing a transmitter from another country, verify it meets local certification requirements. A transmitter certified for USA use might not be certified for European or African markets.
Some countries restrict FM transmitter imports or require special permits. Research import regulations before purchasing from foreign suppliers.
Compliance Verification
Keep all licensing and certification documentation with your transmitter. You may need to prove compliance if questions arise. This includes:
- Operating license
- Equipment certification (FCC, CE, etc.)
- Frequency coordination documentation
- Technical specifications
For inspection or renewal, having documentation readily available simplifies the process.
Question 9: What Is the Manufacturer’s Reputation and Support Quality?
Why Brand Reputation Matters
Maybe you’re comparing transmitters based only on specifications and price. Or you’re considering buying from an unknown supplier because they offer low prices. Equipment reliability, support quality, and manufacturer longevity matter as much as initial specifications.
A transmitter that fails after one year wastes money even if it was inexpensive. A manufacturer that doesn’t respond to technical questions leaves you struggling alone when problems occur. A company that disappears makes parts and repairs impossible.
Research Manufacturer Background
Before buying, research the manufacturer’s history and reputation. How long have they been in business? What’s their track record? Do they specialize in broadcast equipment or is this a side product?
Established manufacturers with years of experience typically produce more reliable equipment. They understand the real-world requirements and failure modes. Their designs incorporate lessons learned from thousands of installations.
Look for manufacturers focused on broadcast equipment rather than companies that produce FM transmitters as one of many unrelated products. Specialists understand the application better.
Customer Feedback and Reviews
Search for customer reviews and feedback about the manufacturer. What do actual users say about product reliability? How responsive is technical support? Are customers satisfied with their purchases?
Be cautious with reviews—some might be fake or biased. Look forpatterns in feedback—do multiple customers mention the same issues or praise the same features? Consistent patterns reveal real product characteristics.
Industry forums and broadcaster communities often discuss equipment experiences. These discussions tend to be more honest than commercial review sites.
Technical Support Quality
Technical support quality separates good manufacturers from poor ones. When you encounter installation problems or operational questions, responsive knowledgeable support saves you time and frustration.
Evaluate support before buying:
- How do you contact support—email only, phone, WhatsApp, live chat?
- What are support hours—business hours only or extended coverage?
- Is support free or does it cost extra?
- Do they provide support in your language?
- How quickly do they typically respond?
At RS, we provide lifetime technical support via WhatsApp for all customers. Our engineering team responds to questions typically within hours. We’ve helped customers troubleshoot installations, optimize coverage, and solve interference problems. This ongoing support is included with every transmitter purchase.
Try contacting the manufacturer with a technical question before buying. Their response tells you what support quality to expect after purchase.
Warranty Terms
Warranty coverage indicates manufacturer confidence in their products. Longer warranty periods suggest better reliability.
Compare warranty terms between manufacturers:
- Warranty duration—1 year, 2 years, 5 years?
- What’s covered—parts only or parts plus labor?
- Who pays shipping for warranty repairs?
- Is there local repair support or must you ship internationally?
- What voids the warranty—improper installation, environmental damage?
Be realistic about warranty value. A 10-year warranty from a manufacturer that might not exist in 5 years isn’t valuable. A 2-year warranty from an established company with proven service is better.
At RS, we offer 5-year warranty on our transmitters. This reflects our confidence in product reliability. Warranty covers defects in materials and workmanship. We maintain spare parts inventory to support fast repairs when needed.
Parts Availability
Transmitters eventually need maintenance and repairs. Can you get replacement parts? Are common wear items like fans and capacitors available?
Established manufacturers maintain parts inventory for years after product sale. They can supply components for older models. Smaller or unstable manufacturers might not stock parts, leaving you unable to repair equipment.
Ask about parts availability before purchasing. Can you order parts directly? Are there minimum order quantities? What’s the typical delivery time?
Training and Documentation
Quality manufacturers provide comprehensive documentation including operation manuals, maintenance guides, and troubleshooting procedures. Some offer training resources like videos or webinars.
Good documentation helps you use the equipment effectively and solve problems independently. Poor documentation leaves you dependent on manufacturer support for routine tasks.
Review available documentation before buying if possible. Does it seem thorough and understandable? Is it available in your language?
Long-Term Relationship
View transmitter purchase as beginning a long-term relationship with the manufacturer, not just a transaction. You’ll potentially work with them for years through equipment lifetime for support, parts, and guidance.
Choose manufacturers you can trust and work with comfortably. This relationship affects your station’s success as much as equipment specifications.
Question 10: What’s My Total Budget Including All System Components?
Beyond Transmitter Price
Maybe you budget for the transmitter cost but overlook other necessary components. Or you assume the transmitter is the complete system. The reality is that transmitter price represents just one part of total system cost—typically 40-50% of complete installation budget.
I’ve worked with customers who had budget for a transmitter but couldn’t afford the antenna system, installation, or licensing fees. The transmitter sat unused while they raised additional funds. Proper budget planning prevents this frustration.
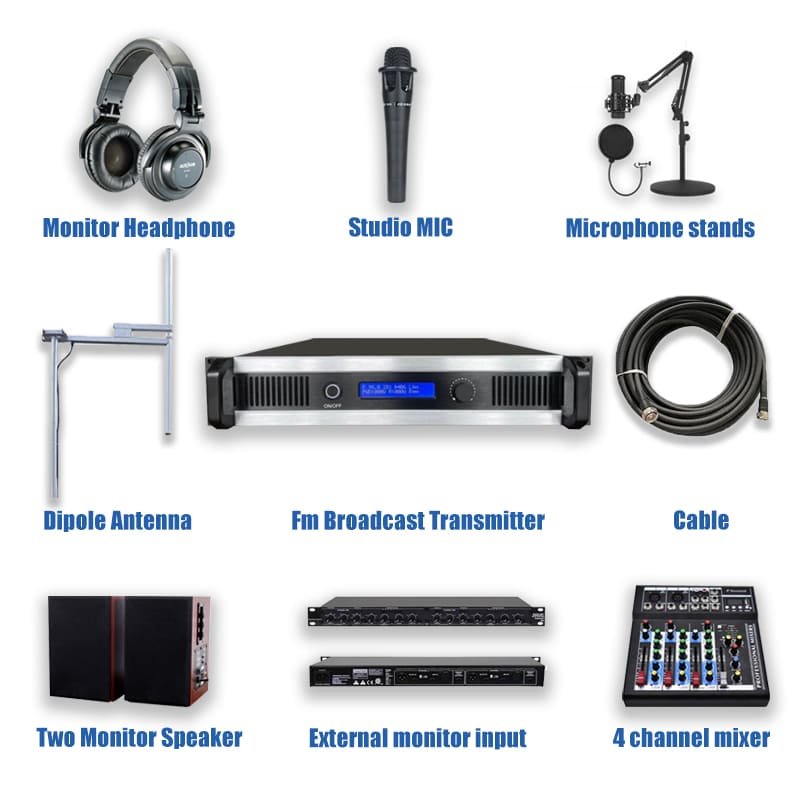
Complete System Components
A functional FM broadcast system requires several components beyond the transmitter:
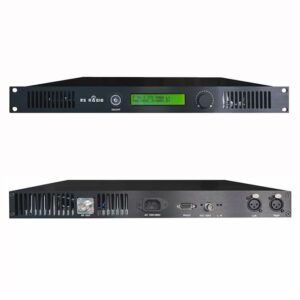
Transmitter: The main equipment that generates and amplifies the RF signal. This is your primary purchase but only one part of the system.
Antenna: Radiates the signal to your coverage area. Antenna cost varies significantly based on type and gain—from basic dipoles to high-gain professional antennas. Don’t underestimate antenna costs.
Coaxial Cable: Connects transmitter to antenna. Quality cable costs more but prevents power loss. Cable cost increases with length and quality level. For longer cable runs, this becomes significant expense.
Connectors and Adapters: Professional RF connectors for cable termination and equipment connection. Quality weatherproof connectors cost more than consumer connectors but are essential for reliable outdoor installations.
Antenna Mast or Tower: Structure to elevate the antenna. This might be simple rooftop mast or complete tower construction. Tower costs vary enormously based on height and type—guyed towers cost less than self-supporting, but require more ground area.
Power Supply and Conditioning: Voltage regulator or UPS to protect against power quality issues. This investment prevents equipment damage from power problems.
Grounding System: Ground rods, cables, and bonding hardware for proper electrical grounding. Essential for safety and equipment protection.
Audio Processing: If not included in transmitter, external audio processor improves broadcast quality. This might be simple or sophisticated depending on your audio requirements.
Installation Labor: Professional installation labor for antenna mounting, cable routing, transmitter setup, and system commissioning. Labor costs depend on installation complexity and local rates.
Licensing and Frequency Coordination: Fees for frequency coordination and operating license application. These vary widely by country and power level.
Test Equipment: If you don’t already own it, basic test equipment like SWR meter and quality FM receiver for monitoring.
Typical Budget Breakdown
For a professional permanent installation, expect this approximate cost distribution:
- Transmitter: 40-50% of total budget
- Antenna and mounting: 20-30%
- Cable and connectors: 8-12%
- Power conditioning and grounding: 8-12%
- Installation labor: 10-15%
- Licensing and coordination: 5-10%
- Contingency for unexpected issues: 10%
These percentages vary based on your specific situation. Tower construction dramatically increases antenna mounting costs. Simple rooftop installation keeps it lower. Long cable runs increase cable costs. Short runs reduce them.
Example Budget Scenarios
Drive-In Cinema (15W system):
Simple application with antenna mounted on existing pole near parking lot center. Minimal cable run. Basic installation.
System includes 15W transmitter, circularly polarized antenna, short cable run, basic mounting hardware, simple grounding, and minimal installation labor.
Campus Radio (100W system):
Antenna mounted on tallest campus building with rooftop mast. Moderate cable run. More complex installation requiring building access and multiple technicians.
System includes 100W transmitter, omnidirectional antenna, quality cable for 30-40m run, rooftop mast, complete grounding system, power conditioning, and professional installation.
Community Radio (300W system):
Professional installation with tower construction or leased tower space. Long cable runs. Comprehensive grounding and power systems. Frequency coordination and licensing.
System includes 300W transmitter, professional antenna, low-loss cable for 50m+ run, tower space or construction, complete power and grounding systems, audio processing, frequency coordination, licensing fees, and professional installation and commissioning.
Hidden Costs to Consider
Several costs aren’t obvious during initial planning:
Building or Property Owner Fees: If you’re mounting antenna on someone else’s building or tower, they might charge rental fees. Some property owners want annual payments for antenna space.
Utilities: Transmitter electrical consumption creates ongoing cost. Higher power transmitters use more electricity. Factor this into operating budget.
Insurance: Some locations require liability insurance for transmitter operation, especially if antenna is on shared building or tower.
Maintenance: Annual maintenance and occasional repairs create ongoing costs. Budget for preventive maintenance and eventual component replacement.
Upgrades: You might need to upgrade electrical service or building access to accommodate transmitter installation. Building electrical panels might need additional circuits or capacity.
Permitting: Some jurisdictions require building permits for antenna installation or electrical work. Permit fees vary by location.
Financial Planning Approaches
Complete System Budgeting: Calculate total system cost including all components and installation. Secure funding for the complete project. This prevents the frustration of partial installation that can’t be completed.
Phased Installation: For budget-constrained projects, sometimes you can phase the installation—start with lower power and basic antenna, upgrade later. This works but costs more overall than doing it right initially. Only choose this approach if complete funding isn’t possible.
Leasing and Rental: Some suppliers offer equipment leasing instead of purchase. This spreads costs over time but increases total expense. Evaluate whether this makes sense for your situation.
Used Equipment: For very tight budgets, quality used equipment from reputable sources might work. This carries more risk than new equipment but can reduce costs significantly. Be cautious about equipment age, condition, and support availability.
Value vs. Cost
Don’t focus solely on minimizing initial cost. Consider total value over equipment lifetime:
Reliability reduces operating costs: Equipment that runs for years without failures costs less long-term than cheap equipment requiring frequent repairs.
Support saves money: Good manufacturer support helps you solve problems quickly without expensive service calls.
Quality installation prevents problems: Proper installation costs more initially but prevents expensive fixes later.
Adequate power from the start: Buying sufficient power initially prevents expensive upgrades when you realize coverage is inadequate.
Sometimes spending more initially provides better total value. Balance budget constraints against long-term considerations.
Funding Sources
Different organizations have different funding options:
Religious Organizations: Congregation donations, fundraising campaigns, memorial gifts, or grants from religious denominations.
Educational Institutions: School budgets, student activity fees, educational grants, or alumni donations.
Community Stations: Listener donations, local business sponsorships, community grants, or crowdfunding campaigns.
Commercial Applications: Business operating budget, equipment loans, or investor funding.
Research funding options appropriate to your organization type. Some grants specifically support community broadcasting or educational radio.
Summary: Making the Right FM Transmitter Choice
Selecting an FM transmitter requires evaluating more than just power output and price. These 10 questions guide you through the key considerations that determine whether a transmitter truly meets your needs.
Start with coverage requirements—understand what area you need to reach and what terrain, obstacles, and conditions affect signal propagation. Match transmitter power and antenna system to your actual coverage needs rather than assumptions.
Evaluate technical specifications that affect broadcast quality—audio performance, frequency flexibility, and protection features. These specifications determine how professional your broadcast sounds and how reliably equipment operates.
Consider the complete system including antenna, cable, power conditioning, and installation. Budget for all components, not just the transmitter. Incomplete systems don’t broadcast.
Research regulatory requirements early and ensure compliance. Operating legally protects your organization and prevents interference problems.
Choose manufacturers with solid reputations, responsive support, and proven reliability. This relationship continues for years through equipment lifetime.
At RS, we help customers work through these questions before purchasing. Our engineering team provides consultation on coverage planning, system design, and installation guidance. We want customers to succeed with properly matched equipment and complete systems.